Android Preferences
The Android preferences are split into various sections listed below:
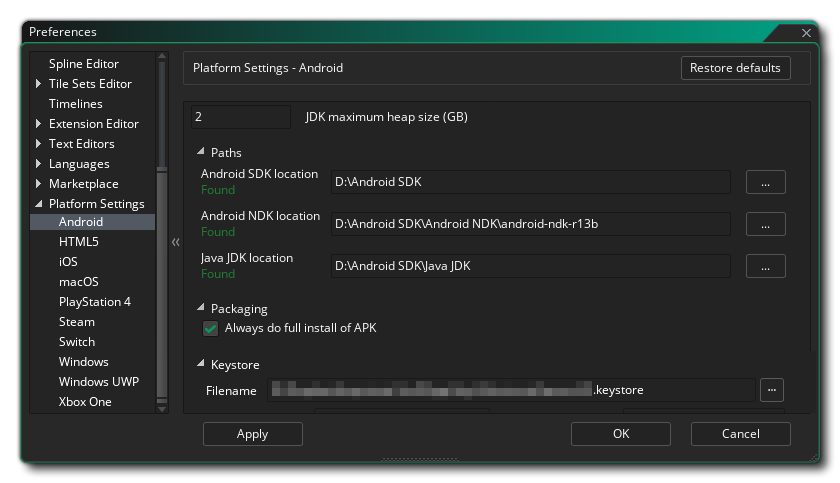 At the top of the preferences you can set the maximum size of the JDK Memory Heap (default is 2GB). Next you have to set up the various different Paths so that GameMaker knows where to look for the various tools required to build the final executable package and test your game. This is split into three sections for the Android SDK, Android NDK and Java JDK. These paths should have been filled in automatically for you, but should you have any issues you can click the button to the right to open the file explorer and manually select the locations for each element. You can find details of what versions are required for each of the SDK elements here. Paths should be validated as you apply them and a message will show "Found" or tell you of any errors (in which case you should revise all the information to make sure it is correct).
Below that you have a section for Packaging options, which only contains one checkbox:
- Always do full install of APK: Flagging this will make GameMaker remove any previous runners of your game from your device, as well as all associated files (for example, *.ini files) from your test device before installing a new version of the game.
Finally we come to the Keystore. This is a file that will be used to "sign" all your Android apps so please fill in all the details correctly and keep in mind that this file will be required to create and update all your Android apps in the future, meaning that after setting it up it is advised to take a screenshot of the settings used and make a backup of the final file. If you lose this file you will not be able to update any existing games that have been uploaded to the store.
To create a new keystore file the following details are required:
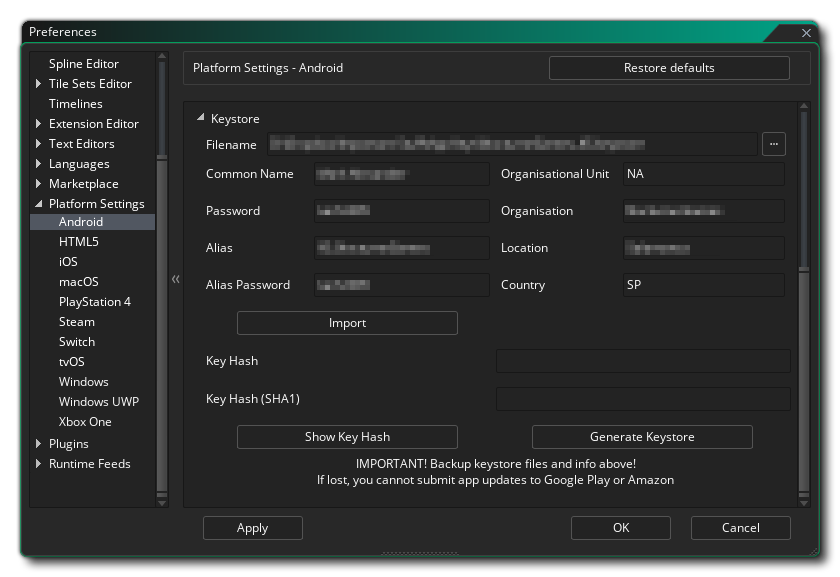
- Filename: This is the name of the keystore file.
NOTE: This is not your name or the company name, but the name of the file to be generated! If you already have a keystore file from previous projects then you can click the file browser button here and direct GameMaker to the previously created keystore file (or click the Import button). In this case, you must still fill out the rest of the required information (exactly as it was when you first generated the file) but you must not click the Generate Keystore button!. That will generate a new keystore file, overwriting the previous one.
- Common Name: This would normally be your name.
- Password: Your security password for the keystore file which must be at least six characters long.
- Alias: This is another name that can be used for the keystore file and should be different to the name entered above.
- Alias Password: Your alias security password for the keystore file which must be at least six characters long.
NOTE If your Android Studio version is 4.2 or above, you must use the same password for the "Password" and "Alias Password" fields above. Using a different password and alias password will cause your builds to fail. - Organisational Unit: The department within the company that you are a part of.
- Organisation: The name of your company.
- Location: The name of the town or city where you are based.
- Country: The standard two letter code for the country where you are based.
Once this information is filled in and you are happy with it, press the button marked Generate Keystore for GameMaker to create the necessary keystore file. This may take a moment but once it is finished, it normally will not need to be changed again. Note that you can click the Import button to import a previously created keystore file (see the Filename section, above) and you can also retrieve the keystore SHA1 hash by clicking the Generate Key Hash button. Pressing this will generate two special security hash keys directly linked to your keystore file that some web sites require for correct functionality (for example, Facebook, or Google Play for the Sha1 hash). Should you need this, simply press the button, then copy and paste the hash keys that are generated.