When you work on a project with other people, there's always a chance there could be a conflict, as multiple people edit the same file and most source control systems can make a good attempt at merging any conflicted files, but when there are changes in the same place, it requires a bit of help to know what to do – this is where a merge tool comes in to show you the changes, and let you decide.
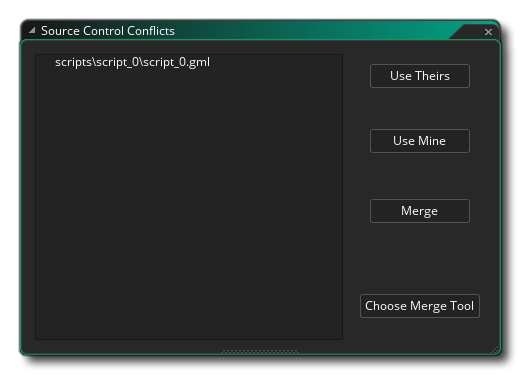
As each merge tool is different, there are four macros that can be used to help specify files to it which can be set up from the Conflicts window by clicking the button labelled Choose Merge Tool:
When you click that button the Preferences window will open on the Git plugin:
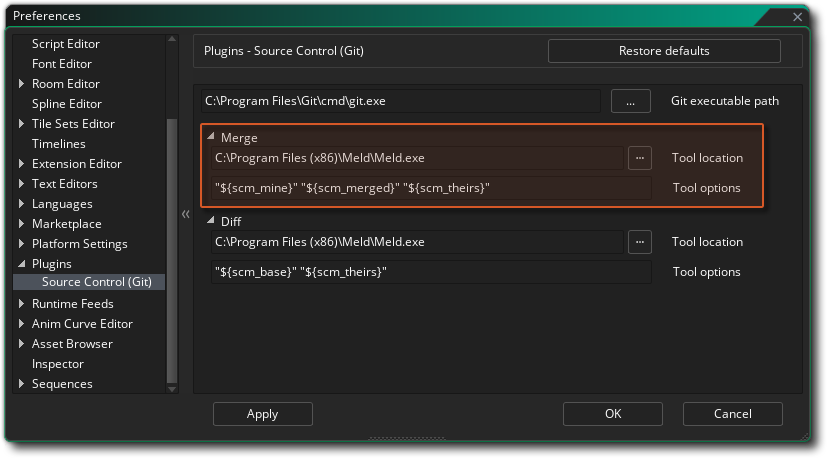 Here you provide a path to the chosen merge tool and then a Merge Tool Options macro (or macros) to use when deciding what to do, with the following options available:
As a help to setting up, when you give a path to certain merge tools, GameMaker will fill in some defaults to get started with, depending on the tool chosen:
Note that if you don't have (or don't want to use) a merge tool, then you can open up the script in the IDE and attempt to fix it from there.
So, back to our example Conflict as stated in the section on Conflicts... We have done a pull from master and one of the files is conflicted. This opens the Source Control Conflicts window, where you can click on the conflicted script, and now click on Merge, since you have configured your merge tool. Clicking merge will now open the tool where you can deal with the conflict and then use the macro(s) supplied to make the required changes. Once you have finished and closed the merge tool, the GameMaker IDE will show the following confirmation window:
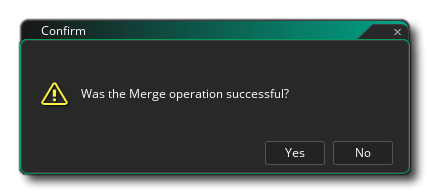 Simply answer "Yes" to this prompt as you've just done it yourself using the merge tool, and then you need to commit this change to signify the end of the merge operation (Source Control > Commit Changes). The Commit window will now show that a merge is in progress as well as show some unstaged files:
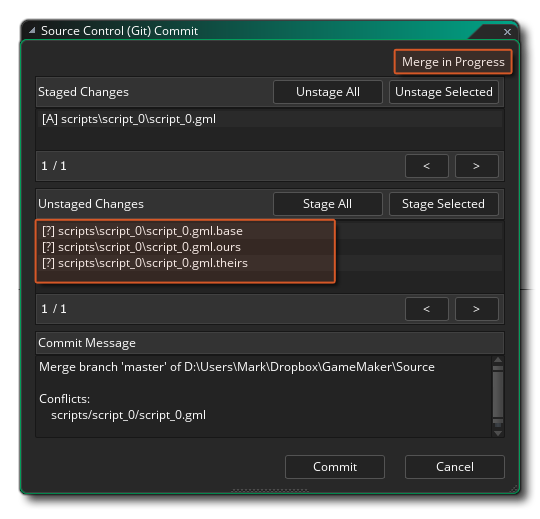 These unstaged files are our script file with the addition of .base, .ours and .theirs. We can safely delete all these so click
 ![]() on the top one and then
on the top one and then ![]() +
+ ![]() on the bottom one to select them all. Next, we right click on the selected files and choose Delete Path to remove them. There's also a commit message pre-filled for us as well, stating that this was a merge, and that there was a conflict (we can add to this or edit it as we wish).
on the bottom one to select them all. Next, we right click on the selected files and choose Delete Path to remove them. There's also a commit message pre-filled for us as well, stating that this was a merge, and that there was a conflict (we can add to this or edit it as we wish).
We can click Commit now.
Due to the fact that you can have issues with other files, it means that your workflow when using remote or shared repositories should be as follows:
Make Changes > Save > Commit > Pull > Merge > Push
You should also set up a Diff Tool for use when doing commits to a repository. This is set up from the Preferences, same as for the Merge tool:
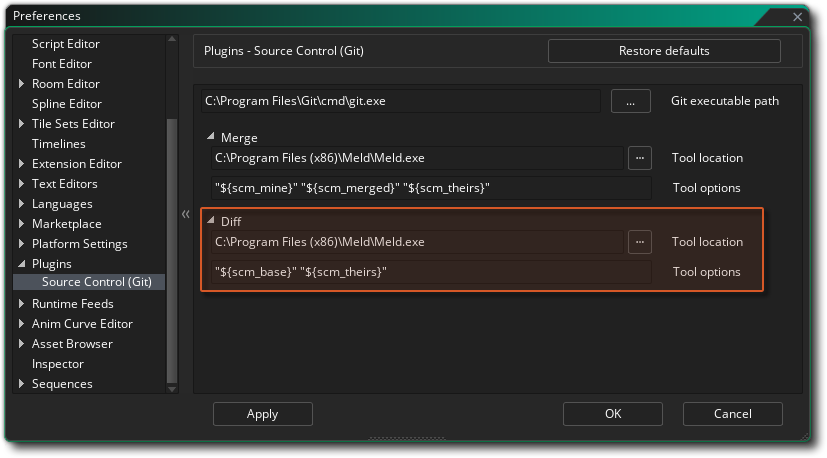 The Diff tool is configured in much the same manner as the Merge tool, but only uses the ${scm_base} and ${scm_theirs} options - in this case, ${scm_base} represents the unmodified file whereas ${scm_theirs} represents the current state of the file. The Tool Options should be pre-populated with the default options for Meld, KDiff3 and TortoiseMerge, just as they were for the Merge tool. Note that GameMaker does not support the outputting of single file diff patches, therefore there is no default for Notepad++.
In order to view changes between current and previous revisions using the Diff tool, simply open up the Commit window and then double click on a file. If the tool has been setup correctly, it will be launched and you'll be able to see the changes between the files.