The Animation Curve Editor
 An animation curve is an asset that contains one or more curves that represent how a value changes over time, and can use linear interpolation, smooth interpolation or bezier interpolation to go between different points in the curve. The values you set on the vertical axis can be between any two values (between -1 and 1 by default) and the duration along the horizontal axis is always normalised from 0 to 1, making it easy to target different time ranges using multipliers in your game code or stretch them to fit a track in the Sequences Editor.
Animation curves are comprised of "channels" and each channel can have its own curve settings, which permits you to - for example - describe a spatial position with two channels for the x/y location, or a colour gradient with 4 channels to represent a colour format. Animation curve assets can be used when working with Sequences and can also be accessed using code, making them a powerful tool when creating your games.
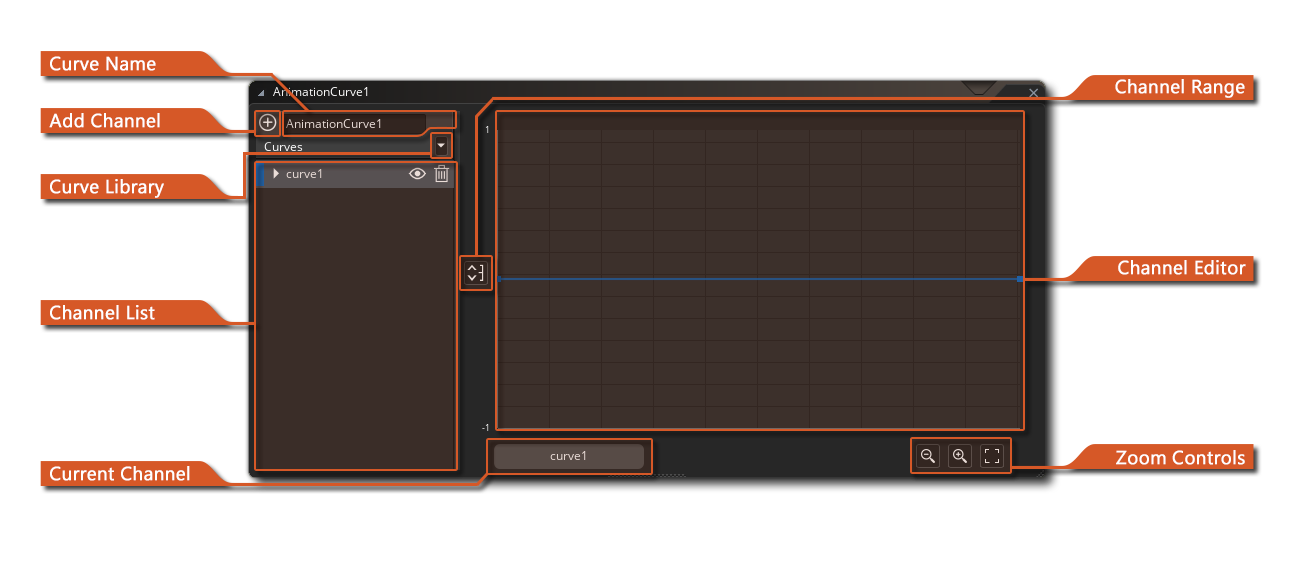
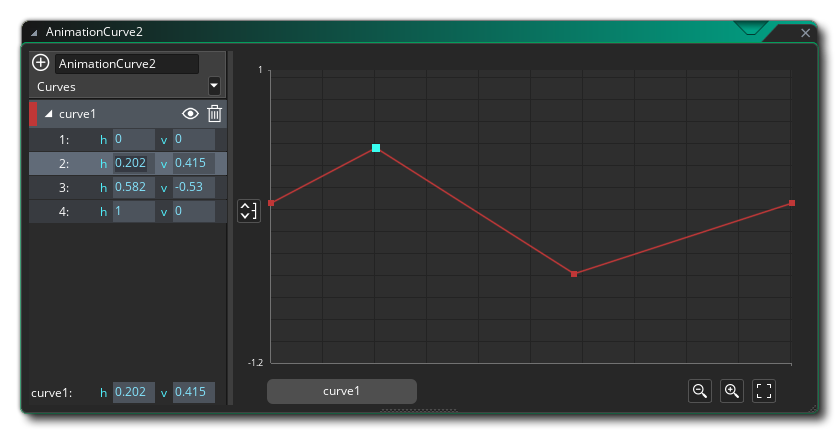
When you first create an animation curve asset the editor window will open and present you with the following sections:
Curve NameCurve Name
Here you can give your animation curve a unique name (alphanumeric characters and the "_" underscore symbol only). This name is what will be used to refer to the curve and all its channels when accessing it through code or in a sequence.
Curve LibraryCurve Library
The  button opens the Animation Curve Library window, which allows you to change the Curve Type of the Animation Curve, and apply a preset to the selected channel.
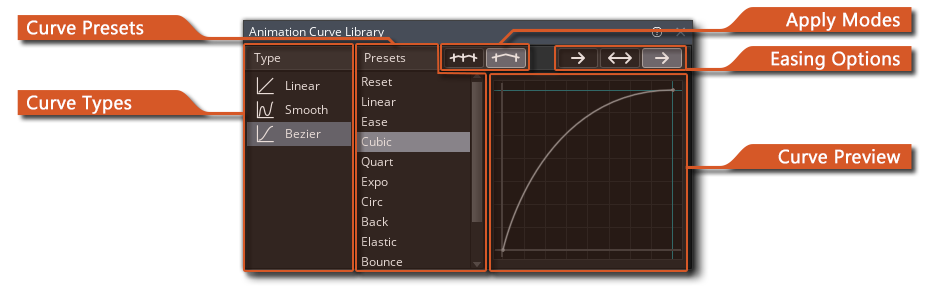 See the section on Animation Curve Library for information on Curve Types and Presets. Note that opening the window through the button will have the "Overwrite" Apply Mode selected by default.
Channel ListChannel List
Channel RangeChannel Range
The Channel Range button is used for setting the visual vertical range for the Channel Editor. By default this will be set from -1 to 1, but clicking this button will open the following window:
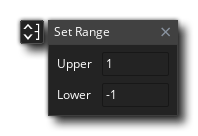 Changing these values will change the way the data is represented in the Channel Editor section, permitting you to have higher/lower values along the channel curve than just -1 to 1. Note that this is purely visual and does not clamp the values for the channel.
Channel EditorChannel Editor
Zoom ControlsZoom Controls
The zoom controls permit you to expand  or contract
  the vertical scale of the channel curves in the Channel Editor. You can also click the "Center Fit" button
  to have the Channel Editor view adjust it's scale to fit all the points on the channel curve within the editor, centered around the mid range of the values:
For information on the different Runtime functions that can be used along with animation curves, please see the following section of the manual:
 You can toggle the channel visibility by clicking on the "eye" icon
  You can edit multiple points at once by clicking
  You can
  Note that opening the Animation Curve Library window through the Channel Editor will have the "Between" Apply Mode selected by default.