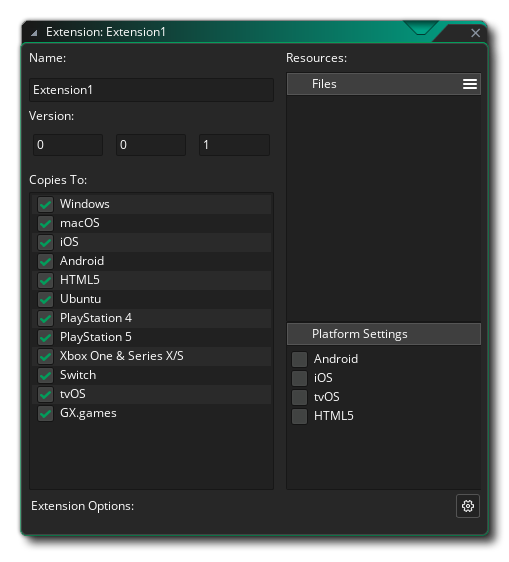
To create an extension, you'll first need to right click ![]() anywhere within the Asset Browser and select Create -> Extension. This will open the Extension properties for your newly created asset in the Workspace:
anywhere within the Asset Browser and select Create -> Extension. This will open the Extension properties for your newly created asset in the Workspace:
 If you do not see this, you can double click on your Extension asset in the Asset Browser to open its properties window or to focus on it when it's already open.
This is now ready for you to add the required files and functions, and you can also give the extension a name here (following the usual convention of only letters/numbers and no special symbols except the underscore "_"). You can also set the version number for the extension should you wish to.
Under "Copies To" you can choose the platforms that this extension is exported to. For a simple GML extension you do not need to worry about this as it will run on all platforms, however if you are creating a platform-specific extension (such as for Android) then you need to make sure that it's not exported to any non-compatible platforms (such as iOS, consoles, etc.).
To add a file to the new extension you need to click the menu icon ![]() and select either a placeholder file ("Add Placeholder") or import the actual file that is required for the target platform ("Add File"):
and select either a placeholder file ("Add Placeholder") or import the actual file that is required for the target platform ("Add File"):
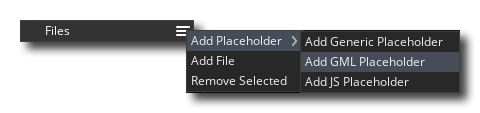
A "generic" placeholder is a file that can be of any type, except those required by the specific platforms (so no DLL or SO files, for example), and it will not be used except as a "linker" file to connect a set of functions or constants with the given extension (generally it is only for use with iOS and Android extensions, which is explained in the sections below for those targets). You can also add "GML" and "JS" placeholder files for more specific use.
Normally you won't need to use placeholders unless you're building for iOS and Android, so you would choose the "Add File" option to add any one of the following files depending on the target platform they are for:
You'll notice that there is no file type for Android or iOS, which is because their set-up is slightly different. Further down you can find explanations on how to set them up but first let's look at creating a general GML extension for any of the target platforms, since the process is the same for all of them.
To start with you need to create the file that is going to be used. For a GML extension, this would be a text file (saved with the .gml extension) and would be formatted something like this:
#define c_alice_blue
return make_color_rgb(240,248,255);
#define instance_create_colour
var i = instance_create_layer(argument0, argument1, argument2, argument3);
with (i)
{
image_blend = argument3;
}
return i;
As you can see, we start each section with a #define call, which in the example above is used to define two functions. Let's look at each part of a defined function:
If you were writing a DLL or JavaScript extension, then the process would be similar but in the correct language for the extension's file format.
Once you have done that, you need to add the file to the extension (using the "Add File" option) which will chain a new window to the Extensions Properties for the File Properties:
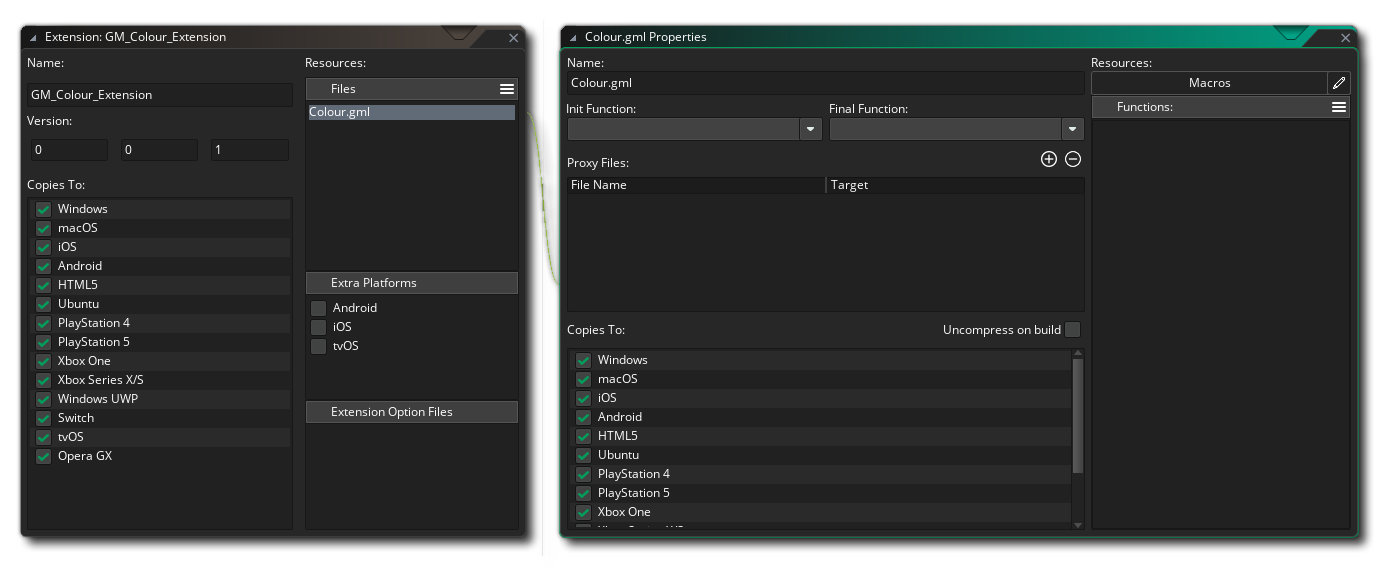
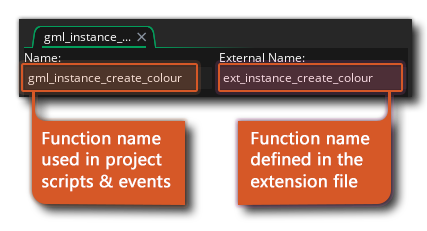
Here you would select the target platform for the extension (for GML you would select them all), as well as rename the extension file and set a few other details, which we'll cover in a moment.
NOTE Adding a file to an extension copies it to the project directory, meaning that any further changes must be made to that copy for them to be visible in-game. You can find the copy by right-clicking on your extension in the Asset Browser and selecting "Open in Explorer".
The editor should automatically be populated with the functions included in our GML file, but if it isn't then you can add them manually by clicking on the functions menu button ![]() and selecting what you require:
and selecting what you require:
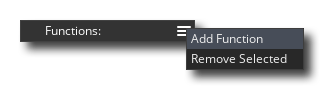
Selecting "Add Function" will permit you to add a function to the extension which can then be called in GameMaker same as any of the built-in functions. Once the function has been added, the following window will open for you to define the function properties (or you can double-click the function to open it):
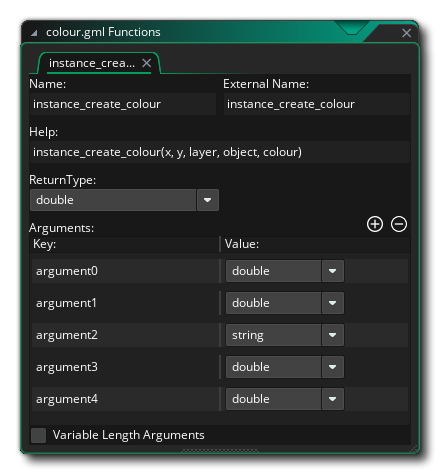
In the image above we have populated the function editor with the details for the function instance_create_colour() that we defined in our GML extension file (note that this function editor window isn't just for defining GML functions -- it will be the same across all extension types). Let's go through each option that can be defined for a function:
NOTE If the function is part of a native extension for Windows, Mac or Ubuntu (dll, dylib or so respectively) and it has more than four arguments, all arguments must be of the same type.
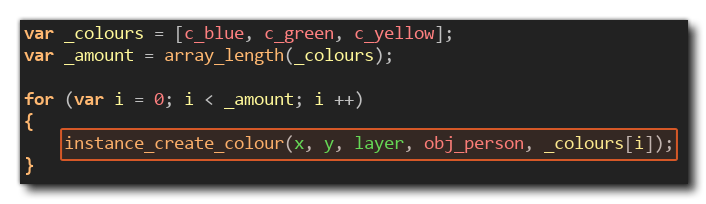
Once you have done all that then the function is ready to be used in the project; it will now show up in auto-complete and be colour-coded too:
 Defined functions can also be set as Init Functions or Final Functions, meaning that they will be called automatically when the game starts (Init) and when the game ends (Final).
IMPORTANT All platforms support the Init function call, but not all platforms will perform the Final function call. This is because certain platforms will simply close the app without giving any notice or time for this function to be called. The platforms mostly affected by this are iOS, Android, HTML5, PlayStation and Xbox.
The other option you have is to create a Macro. A macro can be either a constant value or a short snippet of code (for more information on macros, please see here). For example, we could remove the c_alice_blue function from our previously defined GML extension and make it a macro instead. To create a macro, you can simply click on the "Macros" button in the Extension Properties, which will open the following window:
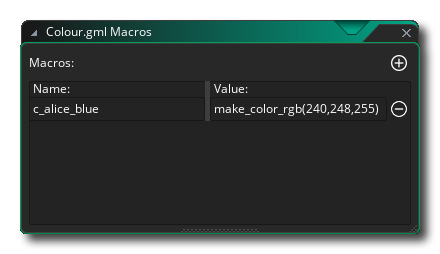
The editor here is pretty much self explanatory: you give the name of the macro and its constant value, or a short line of code. Note that if the macro is a line of code it will be evaluated every time the macro is called.
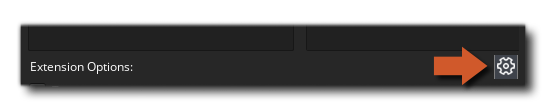
Click on the cog icon next to "Extension Options" to create or modify the options for your extensions:
 After clicking "Yes" on the confirmation prompt, you will see a new window, where you can add new extension options:
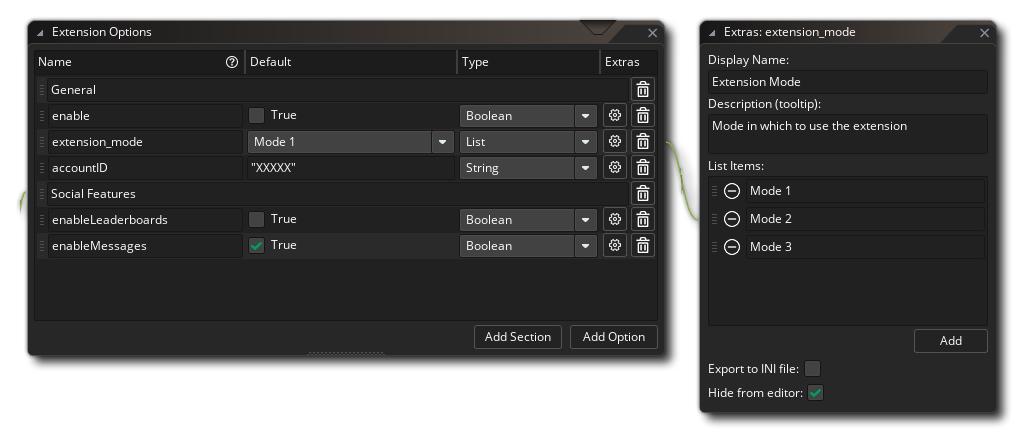 You can give each extension option a name, a default value, and a data type. The name is what you would use internally in your extension code to retrieve the option's value.
Aside from adding options using "Add Option" you can also add sections using "Add Section". A section is not an option, but only a heading displayed in the main Extension Editor window. Use this if you have a lot of options and want to clean up the options list that the end user sees.
The following types of options can be created:
You can also click on the ![]() cog icon next to an option to give it an optional Display Name and Description (that appears as a tooltip on hovering on the Display Name).
cog icon next to an option to give it an optional Display Name and Description (that appears as a tooltip on hovering on the Display Name).
In the extras window, you can also choose to export this option to the options.ini file bundled with your game.
Finally you can choose to hide the option from the editor, making it invisible to the end user who uses the extension.
You can retrieve the values of an extension's options at runtime by using the Extension Functions.
You can also retrieve your extension options in your Compiler Batch Files / Scripts and during Conditional Injection by using the identifier YYEXTOPT_<ExtensionName>_<OptionName>. Keep in mind that since these are executed at compile time, values for the extension options will be retrieved as strings.
NOTE You can use the extension version number in Compiler Batch Files / Scripts as well, using the name GMEXT_<ExtensionName>_version.
Extension options will only be available at runtime if the extension has functions that are used at runtime. However, options will always be exported to the INI file (if the option is enabled) and batch scripts regardless of the extension's use.
When working with multiple target platforms, it is worth noting that you can create a single extension with only one set of functions/macros which will work on all platforms. This is achieved by adding only one of the link libraries to your game as an extension and placing the other(s) into the list of Proxy Files in the Extension Properties window.
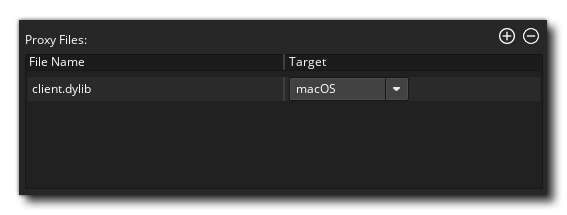 For example, say you have a Windows extension with the dll "Haggis.dll". You would simply replicate this dll as a Mac DyLib, naming it "libHaggis.dylib" and making sure that the internal function names match those of the original Windows dll. This DyLib would then be added into the Proxy Files and set to export when the game is run on the Mac target, and GameMaker will automatically use it when the extension functions are called.
To add a proxy file, you can simply click on the ![]() button in the Properties window for the selected resource file and browse to the file location. Once it is added you may need to update the extension's targets to add the appropriate module, and when you next run your game it will be included as a proxy for that platform. You can remove proxy files too by clicking on the
button in the Properties window for the selected resource file and browse to the file location. Once it is added you may need to update the extension's targets to add the appropriate module, and when you next run your game it will be included as a proxy for that platform. You can remove proxy files too by clicking on the ![]() button which will remove the selected proxy file.
button which will remove the selected proxy file.
Once you have added your proxy files they will be copied into the Extensions folder of your project (you can find them by right-clicking ![]() on the extension and selecting Open in Explorer), so if you need to edit them, you should edit the copied files that are bundled with the game and not the source file that was imported, as GameMaker will be using the ones in the project for compiling.
on the extension and selecting Open in Explorer), so if you need to edit them, you should edit the copied files that are bundled with the game and not the source file that was imported, as GameMaker will be using the ones in the project for compiling.
It is very important that your proxy files follow the naming conventions listed below, as GameMaker will parse these names and assign the target module for the file according to its extension and name and will automatically link the files for you. If you do not follow these conventions your game may not work at runtime, as GameMaker will not be able to work out which file to use so it will not load the file properly.
The naming conventions for each target platform are given below:
| Platform | Names |
|---|---|
| Windows 32bit Runtime | <Name>.dll, lib<Name>.dll |
| Windows 64bit Runtime | <Name>_x64.dll, lib<Name>_x64.dll |
| Ubuntu (Linux) | <Name>.so, lib<Name>.so, <Name>_linux.so, lib<Name>_linux.so, <Name>_arm.so, lib<Name>_arm.so, lib<Name>_linux_arm.so, <Name>_arm64.so, lib<Name>_arm64.so, lib<Name>_linux_arm64.so, <Name>_arm64-v8.so, lib<Name>_arm64-v8.so, lib<Name>_linux_arm64-v8.so, <Name>_armeabi-v7a.so, lib<Name>_armeabi-v7a.so, lib<Name>_linux_armeabi-v7a.so |
| macOS | <Name>.dylib, lib<Name>.dylib |
| HTML5 | <Name>.js |
| PS4 | <Name>.prx, lib<Name>.prx, <Name>_ps4.prx, lib<Name>_ps4.prx |
| PS5 | <Name>.prx, lib<Name>.prx, <Name>_ps5.prx, lib<Name>_ps5.prx |
| Xbox One | <Name>.dll, <Name>_xboxone.dll |
| Xbox Series X|S | <Name>.dll, <Name>_xboxseriesxs.dll |
Using the conventions above, you would swap out the <Name> part for the name of the base file that you are adding the proxy files for.