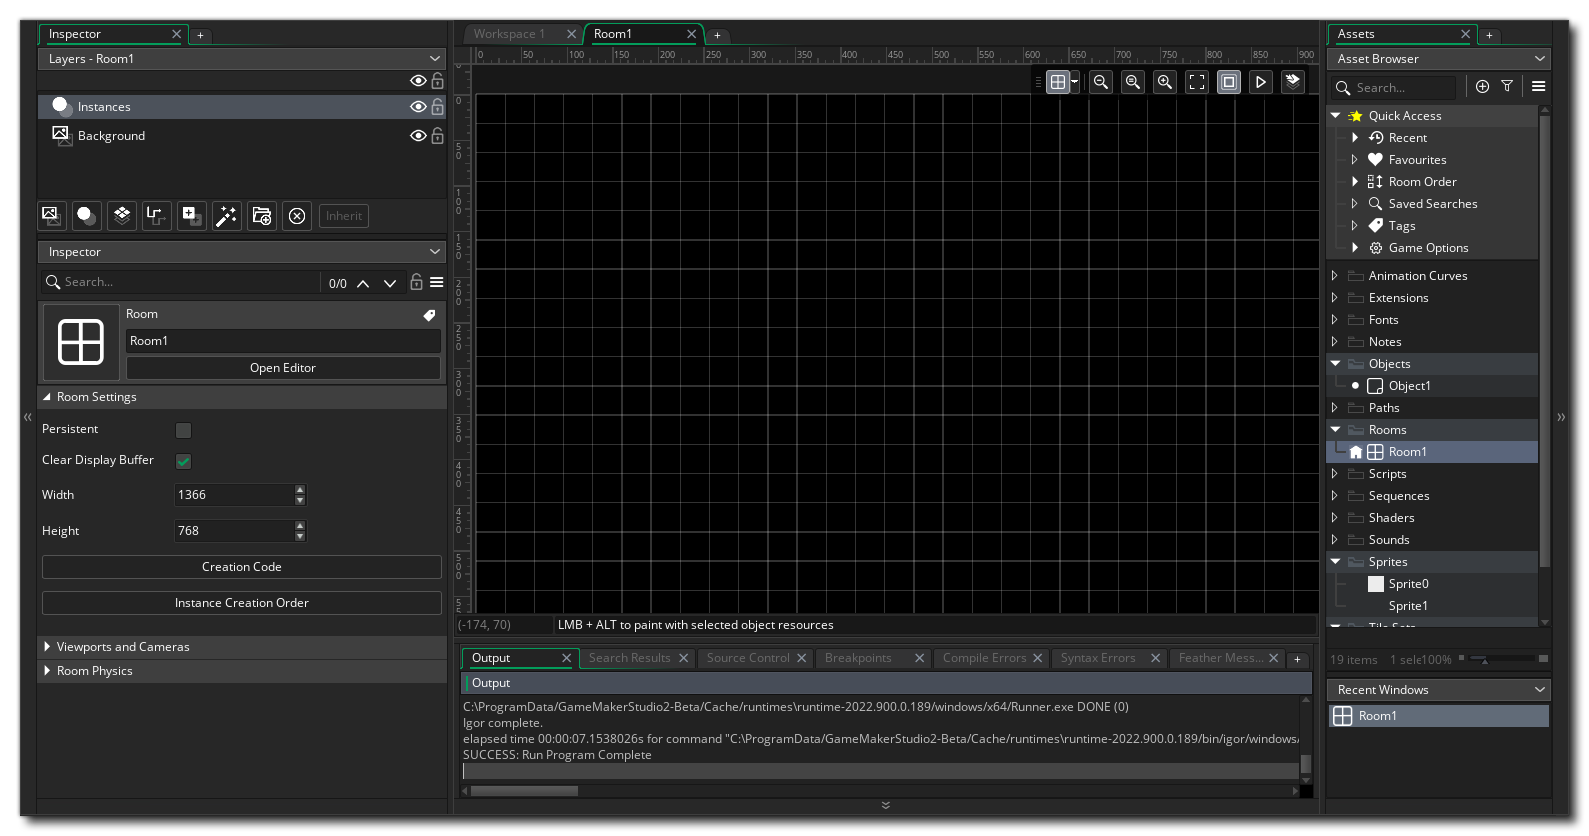
All games that you make in GameMaker need at least one room to run (but can have many, many more) , and a room is just a space where you place instances of the objects that make up your game as well as tiles and any other graphical resources. When you first create a room in the Asset Browser you will be presented with a new Room Editor workspace with which to edit its properties, something like this:
By default the room tools will be placed on the left, with two main sections:
We've mentioned that there are different layer types, so let's just go over what they are and how they can be used when building your games:
| Background Layer | The background layer is a layer that can be filled with a single colour or a single image. It can be moved and positioned within the room, and you can have multiple background layers. Generally this is used, as the name suggests, to generate a constant background for all the other layers in the room. By Default a new room will always contain a background layer, but you can remove it if you don't need it. | |
| Instance Layer | The instance layer is where you place all the instances of the objects that you require for the game. To add an instance to a layer, simply click | |
| Tile Map Layer | After having created a tile sets, you need to add the tiles to your room, which is done by creating a tile map layer. A tile map layer is a layer that permits you to add tiles from any of the tile set assets that you have created and will be set up automatically to use a grid the size of the tile set cells. You can only add a single tile to each grid cell, so if you require multiple tiles to occupy the same space, then you should be using multiple tile map layers. | |
| Path Layer | The path layer is the only one that does not actually get rendered when you run your game. This layer is more of a "convenience" layer for helping you to create or edit Path assets, since it permits you to add or edit paths within the actual room space. | |
| Asset Layer | Sometimes you want a nice graphical effect but don't want the overhead of using an instance or don't need it to do anything other than draw itself. You could use a tile map, but given that tile maps are restricted to using a grid and only a single image per grid cell, they can be a bit restrictive. This is when you would use the asset layer. The asset layer simply takes a sprite resource and draws it using the parameters that you set when you add it into the room. Sprites and sequences can be added to this layer the same way that instances of objects are added to the instance layer, ie: you click |
We won't go into much more details about the room editor here (for that we have this section of the manual), but we will briefly explain how to add instances to an Instance Layer, as you'll need to know that for the next section of the Quick Start Guide.
To add an instance to the room editor, you must first select an Instance Layer from the Layer Editor on the left (or create one if none exist). You can then go to the Asset Browser and simply click ![]() and drag an object that you want from there and drop it into the room at the position you want, which will add a single instance of that object to your game:
and drag an object that you want from there and drop it into the room at the position you want, which will add a single instance of that object to your game:
If you want to place multiple instances in the room, then you can select an object from the resource tree and then press and hold ![]() to preview the resource, and if you additionally click the left mouse button
to preview the resource, and if you additionally click the left mouse button ![]() you can then "paint" it into the room layer.
you can then "paint" it into the room layer.
Note that assets are given a position when they are added into the room editor based on their X and Y axis positions relative to the room origin. The room origin is the (0, 0) position, which in GameMaker is the top left corner, and to the right is +X and down is +Y, e.g.:
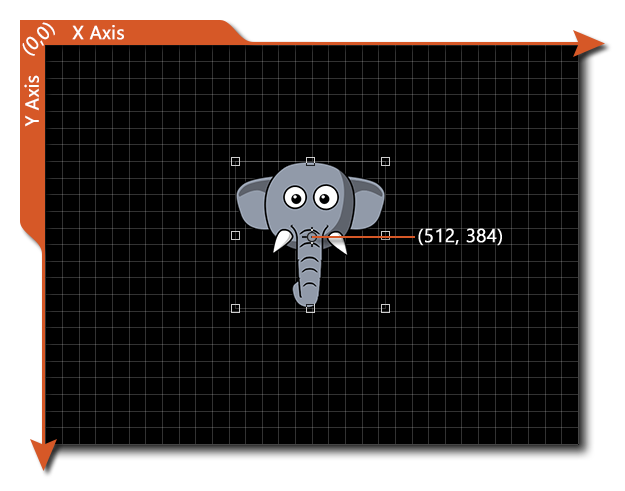 In the above example the instance is placed in the middle of the room at position (X:512, Y:384). It's also possible to go outside of the room bounds and have positions that are greater than the room axis lengths, or even less than than the room origin - in which case the X/Y coordinates will be negative values.
For more detailed information on the Room Editor, you can see the following section of the manual:
That wraps it up for the Room Editor in this Quick Start Guide, and you should now know enough to actually get started creating sprites and objects and designing rooms for them. The next sections of this guide are going to cover some of the programming fundamentals to help you on your way, starting with actually Drawing things to the screen.