The Script Editor
 This section deals with the script editor (also called the text editor) which is where you type in all the code that your game will require to run. This editor is used for creating custom script assets, as well as for coding object events, for adding room creation code, and for many other things.
This section simply details how the script editor works, and not how to create script assets nor how to use GML Code or GML Visual to make scripts. For that please see the following sections:
On creating a script asset, you may be asked to choose between GML Visual and GML Code. See GameMaker Language for more information.
The script editor is where you write your GameMaker Language code, which is the built-in programming language that GameMaker uses (see the GameMaker Language section for more details). Once you become more familiar with GameMaker and want to use it to its fullest extent, it is advisable to start learning to use this language, as it greatly expands your possibilities when creating games.
A script asset can be renamed by right-clicking  on it in the Asset Browser and selecting Rename, but note that the script name must conform to the scripting rules for assets, so they can only be alpha-numeric, must start with a letter, and the only symbol they can contain is the "_" under-bar symbol. The script editor in other places cannot be renamed and will have a name specific to what is being edited, like an object event for example.
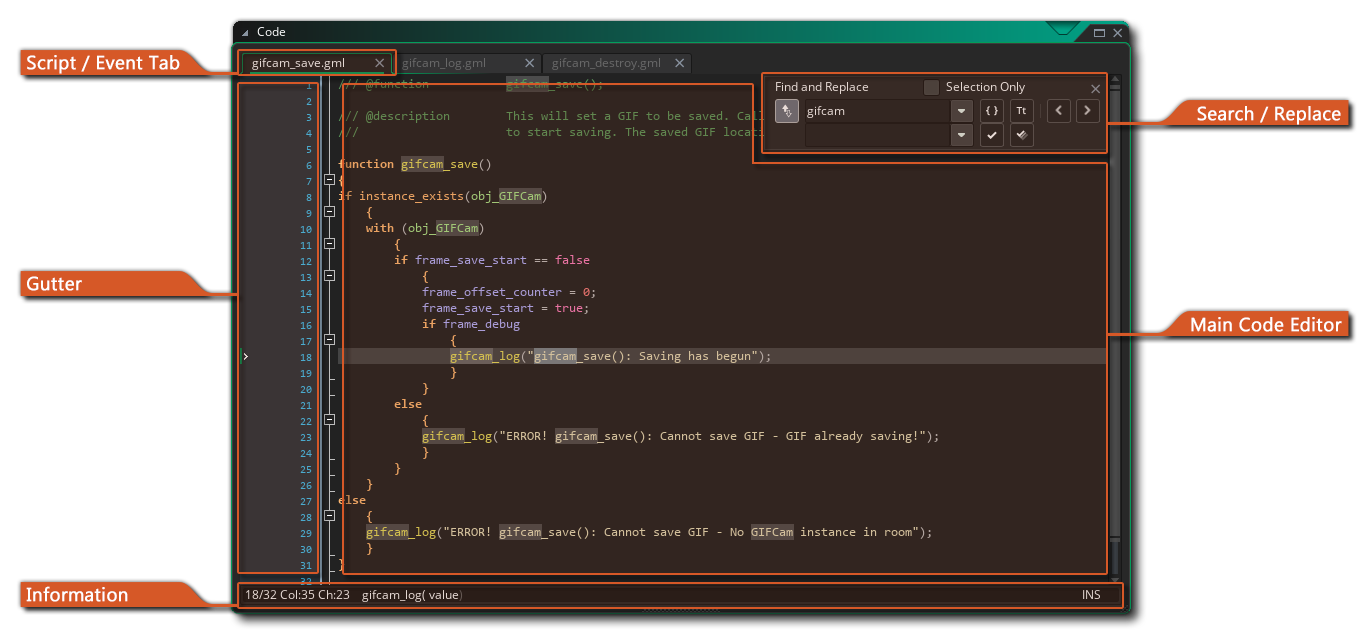
When you open the script editor window it will have the following options and layout:
Script / Event TabScript / Event Tab
The script editor opens in a window with tabs across the top to let you have multiple scripts or events in one window (although this behaviour can be changed from the Preferences to give a new window to each script or event). You can click  on a tab and then drag it to change the tab order, or - if you prefer - you can pull it out of the current window and place it on the workspace to create a new window for that script (or add it to a different window), and you can also maximise the script editor to create a new workspace too. If you drag a script tab out of the IDE window, then a new IDE will be spawned to hold this script resource, and it can be used as you would the Main window.
Note that if you are editing code from an object event in the script editor and you have maximised the script editor or have it on a separate window or workspace, then the right-click editor menu will have some extra options:
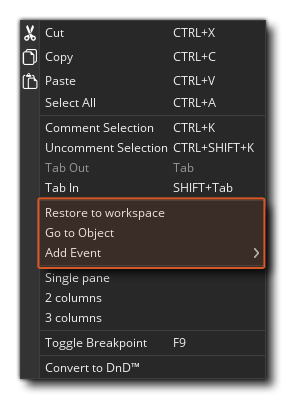
- Restore to workspace: This will take the script editor out of a maximised/workspace state and re-chain it to the object in the workspace.
- Go to Object: This will take you to the workspace that the object with the code is on and focus on the object.
- Add /Open Event: This permits you to add a new event to the object the current script belongs to, and will open a new code tab in the Script Editor for the added event. If the event selected already has code in it, then this will be opened in a new tab.
For information on the rest of the right-click menu options, see the section on Editing, below.
GutterGutter
Search / ReplaceSearch / Replace
While working in the script editor, you can press  /
/  + "F" to open up the Search box or / + "H" to open up Search and Replace:
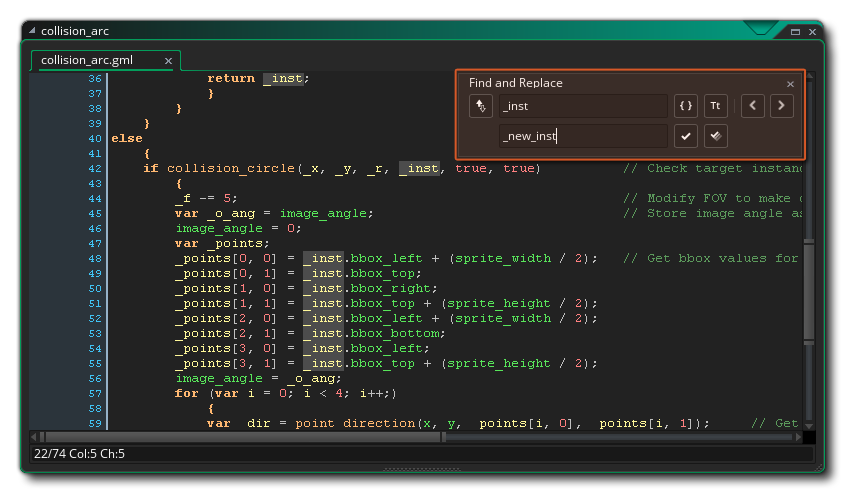 Here you can perform a local search for the keyword you input and once you have entered your search term, you can then use the arrows at the top right of the search window to skip from one found term to the next in the script. You can change how the search operation is carried out by toggling the following buttons:
 | When you toggle this, the search function will only highlight those strings that match the whole input string. For example, with it off a search for "random" will show up all words that contain this string - like irandom(), or randomise() - while toggling it to on would only show the function random(). |
 | When this option is toggled, you are telling GameMaker to check not only the contents of the search string, but the case too. For example, if you have a sprite called "spr_Dog" and do a search for " dog" with this toggle off, then the sprite string will be highlighted, however if the toggle is on then it won't since "Dog" is no longer considered the same as "dog". |
If you have opened the search window using / + "F", then the replace functionality will not be visible, so you need to click the Replace button  to open it. Once open, you can then enter a string that will be used to replace any given search string, using the following buttons to perform the action:
 | Clicking this will replace the next search string found in the script with the given replace string. Note that the "next" term is considered the next one after the current cursor position, and you can skip to different ones using arrow buttons at the top right of the search window. |
 | Clicking this will replace all examples of the search string within the script using the given replace string. |
Note that if you want to do a global search (ie: search the whole project rather than the current script or event), then you can press / +  + "F".
Main Code EditorMain Code Editor
The main code editor is where you'll write all your code to create the script asset or fill an object event. The actual edition of your code is covered in the section on Editing further down this page.
InformationInformation
The information bar at the bottom of the IDE shows you the current line number you are on and the position along the line. It is also where you can see the code helper, which is a line of text that shows the function you are currently editing along with the arguments it requires. As you fill in the function in the editor, the arguments will highlight to show you which one you are currently editing.
Note that any optional arguments in your script functions will be shown with [] brackets around them. If you have used the JSDoc Script Comments within a script asset then the information you have supplied will also show here.
You can get further information about using the script and code editors from the following pages:
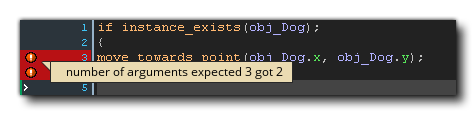 You can find more information on Syntax errors (and general errors when testing or compiling your code) from the following section:
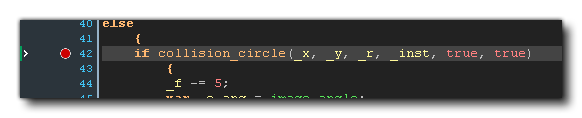 Finally, the gutter will also show any bookmarked items too. To bookmark a line of code simply hold down