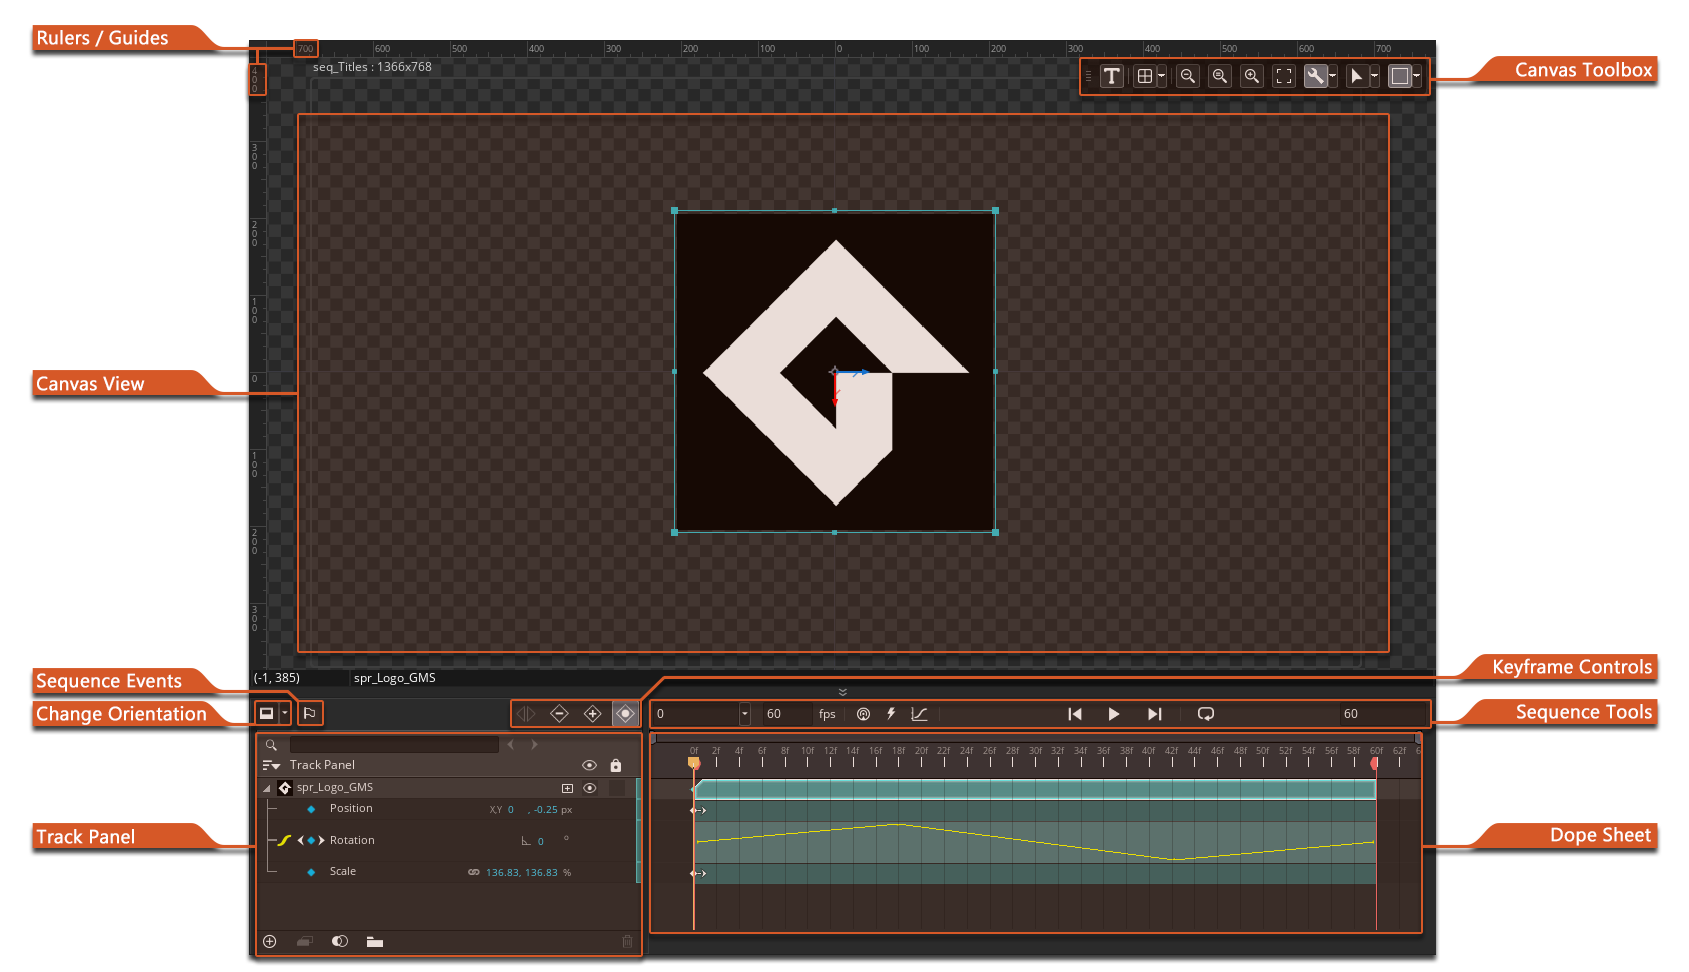
A Sequence is essentially a collection of assets that perform a dynamic animation over time. They can contain sprites, instances, sounds and other things, and each of these can be set to move or change colour, or start/stop animating over time within the sequence itself. The assets you add are assigned to specific tracks within the sequence and these tracks can then have different attributes applied to them - called keyframes - which can be static or change over time. All editing of a sequence takes place in the Sequence Editor which is essentially comprised of three areas:
Note too that you can have sequences within sequences to create complex animations and effects, and sequences can also be accessed and changed through code to give you as much control as possible over how they will be displayed and used in your game. For more information on the coded aspect of sequences, please see the section on the Sequence Functions page.
Before continuing to explain the details of the editor, we'll take a moment to explain how a sequence is created as well as some keywords that are used in the descriptions so you'll have a more thorough understanding of how the Sequence Editor works. The general workflow for creating a sequence is as follows:
Below you can find an overview of each of the features of the Sequence Editor, and at the bottom of this page are links to pages that explain the three main features mentioned above in more depth:
Rulers / GuidesRulers / Guides
The rulers along the edge of the canvas show you the position of the things that are placed within it, and are marked from (0, 0) which is the center of the canvas and the default origin for the sequence. You can click and drag on the rulers to pull a horizontal or vertical guide into the sequence, and this guide can then be used to accurately position the different assets that are being used, as moving an asset close to one will "snap" it to the guide. While positioning assets within the sequence, smart guides will also be temporarily shown indicating the distance between assets, as well as the distance from the sequence boundary or center point.
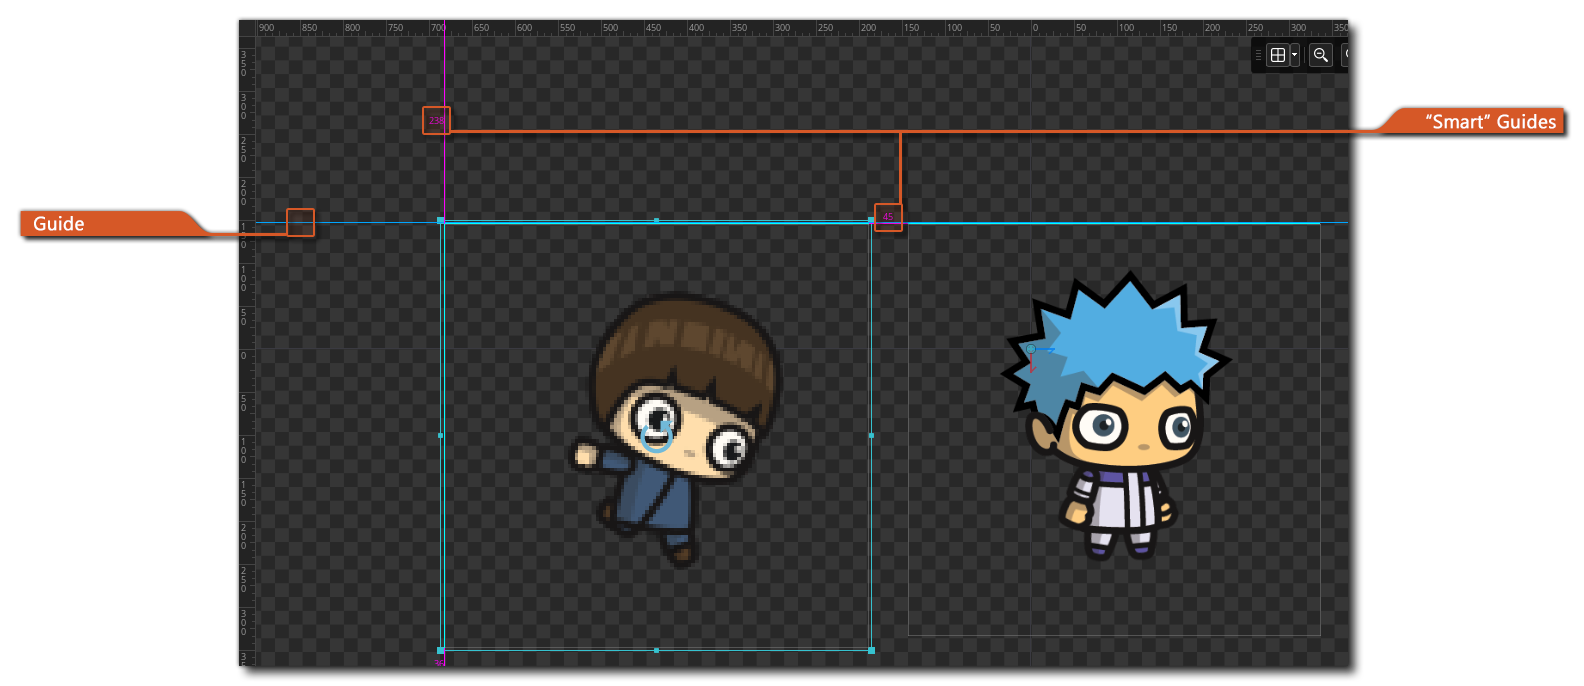 Note that the boundary of the sequence and the center point marker lines for the sequence are also considered guides and will behave the same way as guides added from the rulers, with the exception that they cannot be edited.
The distance that assets "snap" to guides, as well as other properties, can be set in the Sequences Preferences.
The canvas view is where you can see a preview of the sequence canvas, and is where you can edit and position the different assets that make up your sequence. You can add an asset to the sequence by simply dragging it from the asset browser and then dropping it into the canvas, and this will create a new track in the Track Panel, and also add an asset key for the asset at the current timeline playhead position. The following assets can be dropped onto the canvas in this way:
You can also use the ![]() Text tool in the Toolbox to create a text track. Read Text in Sequences for more information.
Text tool in the Toolbox to create a text track. Read Text in Sequences for more information.
Each asset added to the canvas can be manipulated in multiple ways - rotated, transformed, or translated - based on how you interact with it, as each asset will have a bounding box and transform gizmos as well as bounding box controls. All this is explained in more detail on the page about the Sequence Editor Canvas.
NOTE Sound assets, when added to a sequence, are essentially sound emitters that play only the given sound asset.
To navigate around the canvas view, you can use the same basic controls as for general Workspaces, ie: Use the middle mouse button ![]() and drag to pan the canvas (or alternatively use the
and drag to pan the canvas (or alternatively use the ![]() +
+ ![]() combination), and you can scroll horizontally with the mouse wheel
combination), and you can scroll horizontally with the mouse wheel ![]() or zoom in and out using the
or zoom in and out using the ![]() /
/ ![]() key and the mouse wheel
key and the mouse wheel ![]() . You can also cut, copy and paste assets using the
. You can also cut, copy and paste assets using the ![]() /
/ ![]() + "X",
+ "X", ![]() /
/ ![]() + "C" and
+ "C" and ![]() /
/ ![]() + "V" key combinations.
+ "V" key combinations.
Keyframe ControlsKeyframe Controls
The keyframe control buttons are one of the ways that you can add, remove or edit specific keys in the dope sheet. The buttons are as follows:
Sequence EventsSequence Events
In a similar way to regular objects, sequences can have events that can run some code assigned to them. The code is assigned in the form of a scripted function which can take no arguments and will be called when the event is triggered.
Events are added by clicking the Add Event button ![]() which will open the following window:
which will open the following window:
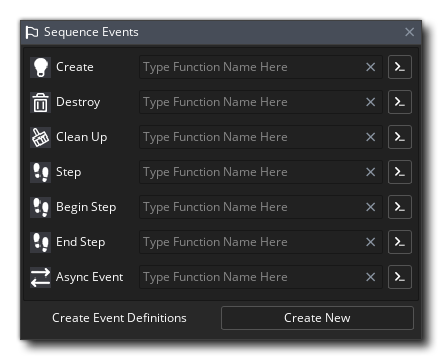
The events listed here are as follows:
Each event can be assigned a single function which will be called when the event is triggered. You can assign the function using the input box for the event, and clicking the arrow button will open the script editor for the function to be edited. You can also click the Create New button at the bottom to create a new script resource with "boilerplate" functions already defined and ready to be filled in. Note that you can change the function names to anything you require and do not have to use the predefined names, and you can also remove any function definitions that you don't need. It is important note that functions used for sequence events cannot take any arguments.
Sequence events can also be added and edited using code. For more information please see here.
The Track Panel is where each of the assets in your sequence is listed as a track, with each track having sub-tracks for any parameters that are being changed for the asset. You can click ![]() and drag on any asset track to change its position above or below the other tracks (any assigned parameter tracks will move along with it), and you can use
and drag on any asset track to change its position above or below the other tracks (any assigned parameter tracks will move along with it), and you can use ![]() /
/ ![]() +
+ ![]() to select multiple tracks.
to select multiple tracks.
You can create a track by dragging an asset from The Asset Browser (either a sprite, an object, a sound, a sequence or a particle system) into the sequence canvas, or you can click the ![]() icon at the bottom to add a new track and select the asset to use from the Asset Explorer window that opens. The new track will be created and the asset added at the current playhead position within the dope sheet timeline:
icon at the bottom to add a new track and select the asset to use from the Asset Explorer window that opens. The new track will be created and the asset added at the current playhead position within the dope sheet timeline:
 The track editor has many other features that are discussed in full detail on the following page:
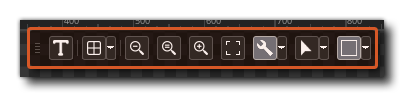
The Sequence Editor toolbox contains the different visualisation and setup options for the sequence being edited.
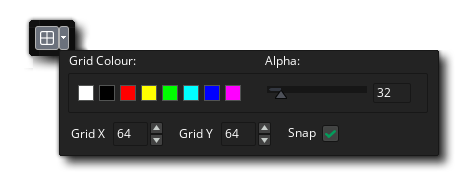 These options permit you to set the grid colour and alpha, as well as the cell values for the grid along the X and Y axis. You also have an option to enable or disable grid snapping here (disabled by default). You can use the keyboard shortcuts "G" and
  This gizmo can control how the asset is scaled or rotated, as well as control its position and the position of the origin of the asset, however it only shows one of these options at a time. Clicking this button will switch between the different widget types or you can click on the options menu
 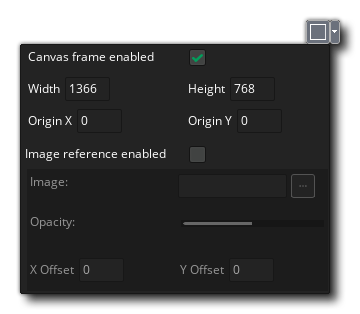 Here you can set the canvas frame toggle as well as the size of the canvas. You also have the possibility of setting a reference image, which is an image that you select from your computer (it is not imported into the project) to be used as a background reference for the sequence. This image is only visible in the Sequence Editor itself and will not be rendered when the sequence is used in a project. If you add a reference image you can also set the opacity that it's drawn at and offset its position within the canvas frame.
This bar has the various sequence playback controls:

As mentioned above, you can add Moments to a sequence. A sequence moment is a position on the timeline where the sequence can call a function. This is a scripted function that must have no parameters and when the moment (frame) on the timeline is reached, this function will be called. To set a moment, you simply move the playhead to the required position and then click the Add Moment button, and in the dialog that opens you give the name of the function to call.
 When adding a moment function, you can click the
 ![]() button to go to the script with the specified function, or you can click the
button to go to the script with the specified function, or you can click the ![]() button to create a new script resource with an empty function ready for editing. You can also remove the moment and the function call it contains by clicking the
button to create a new script resource with an empty function ready for editing. You can also remove the moment and the function call it contains by clicking the ![]() button.
button.
Sequence moments can also be added and edited using code. For more information please see here.
The Dope Sheet is where all the asset key and parameter keys for each track are shown. You can click ![]() and drag keys left or right to position them within the dope sheet timeline, and you can also click
and drag keys left or right to position them within the dope sheet timeline, and you can also click ![]() on the right edge of an asset key to change its length. Note that for sprites and objects, setting the length to be longer than the animation will cause the animation to loop over the extra frames. The dope sheet also has controls for setting the start and end of the clip region for the sequence, and you can click
on the right edge of an asset key to change its length. Note that for sprites and objects, setting the length to be longer than the animation will cause the animation to loop over the extra frames. The dope sheet also has controls for setting the start and end of the clip region for the sequence, and you can click ![]() anywhere to set the playhead to that position. For more information on how to use the dope sheet, please see the following page:
anywhere to set the playhead to that position. For more information on how to use the dope sheet, please see the following page:
Change OrientationChange Orientation
The change orientation button ![]() can be used to change the way the Sequence Editor displays the different sections. By default you will have the Canvas View at the top and the Track Editor and Dopesheet at the bottom, but this can be changed by clicking the button to cycle through the different layouts, or by clicking the Options button
can be used to change the way the Sequence Editor displays the different sections. By default you will have the Canvas View at the top and the Track Editor and Dopesheet at the bottom, but this can be changed by clicking the button to cycle through the different layouts, or by clicking the Options button ![]() to open a menu and select the layout that you want. The following layouts are available:
to open a menu and select the layout that you want. The following layouts are available:
| Split Window | With this option the Sequence Editor will be split into two separate windows, where the main IDE window will show the Canvas view in the full desktop and the new window will show the Dope Sheet and Track Editor. Clicking the button again will change the layout again and remove the extra window. | |
| Snap Top | This option snaps the Track Editor and Dopesheet to the top of the IDE. | |
| Snap Right | This option snaps the Track Editor and Dopesheet to the right of the IDE. | |
| Snap Bottom | This option snaps the Track Editor and Dopesheet to the bottom of the IDE (this is the default view). | |
| Snap Left | This option snaps the Track Editor and Dopesheet to the left of the IDE. |
You can also reset the Sequence Editor layout at any time by clicking the Reset option ![]() . This will restore the editor to its default state and re-open any sections that had been closed.
. This will restore the editor to its default state and re-open any sections that had been closed.
Due to the initial complexity of the Sequence Editor, we have only given a brief overview of the features available here, but we have additional pages listed below that go into more depth about its features and how they can be used: