The Particle System Editor
The Particle System Editor can be used to create visual particle effects and preview them in real-time, as they would appear in-game.
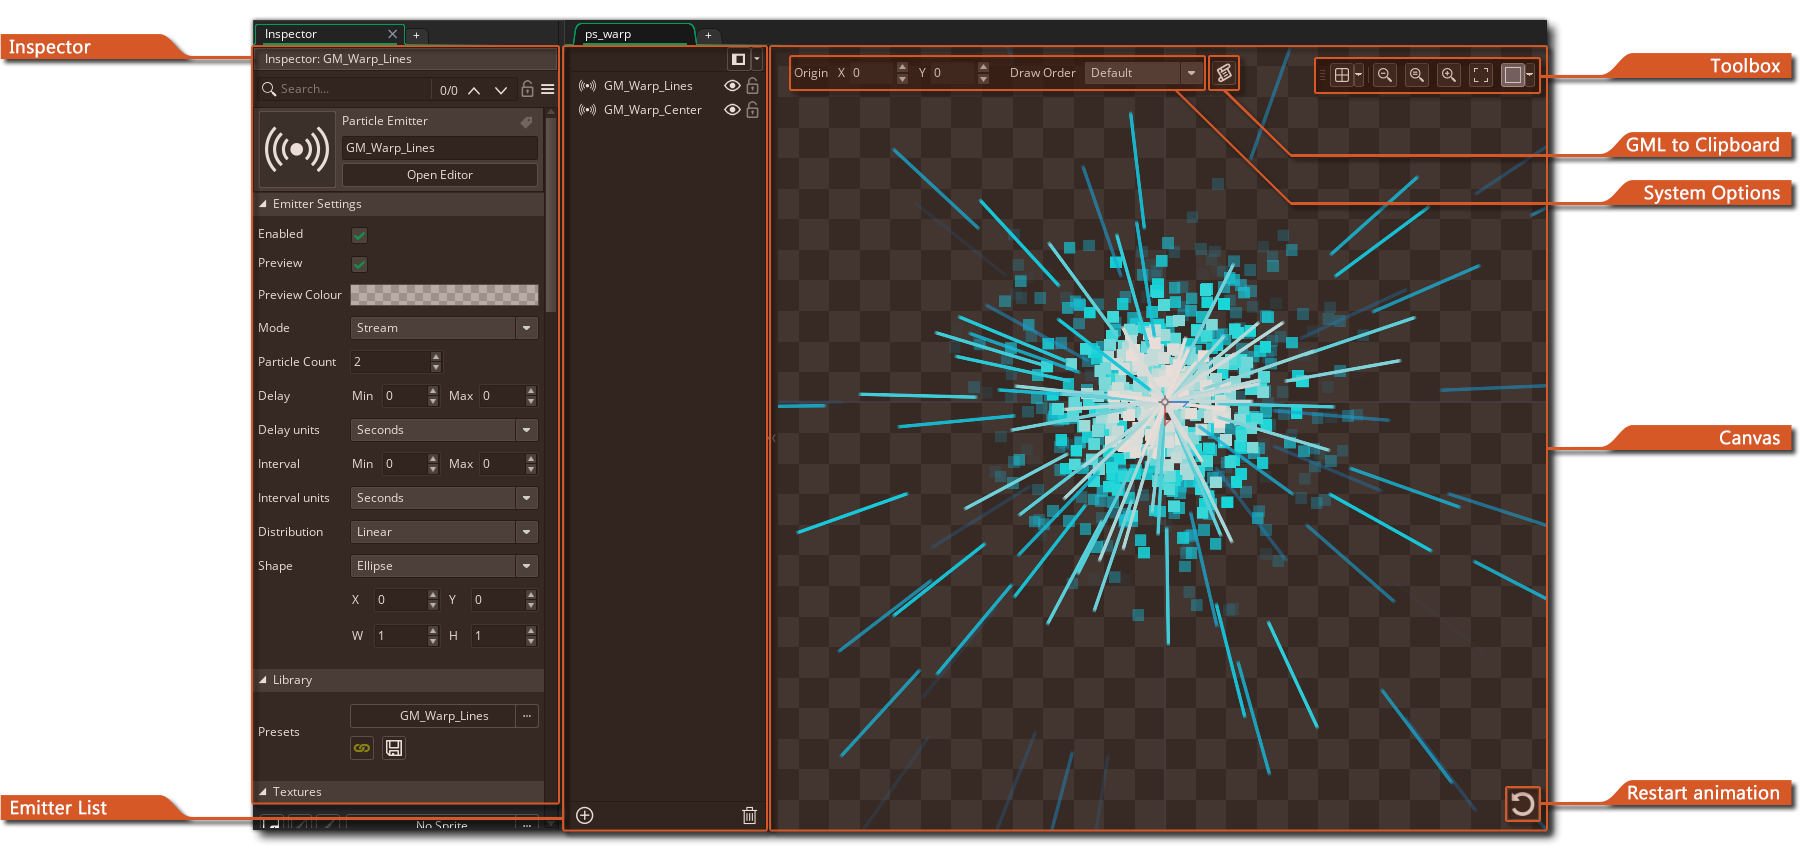
Double-clicking on a Particle System asset in The Asset Browser will open this editor:
 A Particle System consists of various emitters, each of which "emits" a particular type of particle. A particle is simply an image that is animated according to its settings, and has a fixed lifespan.
By creating emitters inside systems and configuring their particle settings, you can create effects ranging from fire, explosions, etc. to complicated effects that use multiple emitters, as shown above.
Contents
Creating A Particle System
These are the basic steps for setting up a Particle System Asset:
- Create a Particle System Asset and modify the default emitter (see Emitter Properties)
- Optionally, add more emitters to achieve your desired effect
- Add the particle system asset to your game in any of these three ways:
- Drop it inside an Asset Layer in The Room Editor
- Drop it inside a Sequence as a track
- Add GML Code to show the effect at runtime:
- Create the particle system using part_system_create/part_system_create_layer or the GML Visual equivalent: Create Particle System
- Paste the code generated by the Copy GML to Clipboard
 button where needed in your code
 - Create the particles in an existing particle system using part_particles_burst
Using A Particle System
As briefly described above, a Particle System can be used in your game in three ways:
Add To Room EditorAdd To Room Editor
Drag a particle system asset onto The Room Editor canvas with an Asset Layer selected. The entire particle system, including its emitters, will be added as an element to the layer. To preview the particle system in the Room Editor, press the Play Animation button ![]() .
.
When the game is run, the particle system is instantiated on the layer and starts playing immediately. The layer element added is of type layerelementtype_particlesystem (see layer_get_element_type).
NOTE You cannot get the particle system ID for particle systems that you add this way.
Add To Sequence EditorAdd To Sequence Editor
Drag a particle system asset onto The Sequence Editor canvas. This adds a new sequence track of type seqtracktype_particlesystem to the sequence.
IMPORTANT This adds a single track for the whole particle system. Individual emitters in the particle system cannot be animated separately in a sequence.
Create At RuntimeCreate At Runtime
Spawn the particle system in GML Code using one of the built-in functions part_system_create/part_system_create_layer or in GML Visual using Create Particle System.
Pass the Particle System Asset to the function/action as the optional partsys argument:
p_sys = part_system_create(ps_MyBeautifulParticleEffect);
By passing a value for this optional partsys parameter, GameMaker will initialise the particle system for you according to how you set it up in the Particle System Editor.
You can use particle_get_info to get the emitters and particle types used in a particle system. You can use this to manually spawn a particle type using part_particles_create.
The Canvas
The canvas displays a preview of all particle emitters that you added to the system, and allows you to move and resize emitters.
Every emitter is shown, including a preview of its region and shape (rectangle, ellipse, diamond or line) in which it emits its particles. This preview can be disabled for each emitter separately.
Origin, Draw Order & Copy GML
The Origin and Draw Order as well as the Copy GML to Clipboard button are shown in the top-left corner of the canvas.
 Origin indicates the position on the canvas around which transformations take place, similar to a sprite's origin. If you add a particle system asset to a sequence or to a room asset layer, its X, Y position will correspond to the origin set here.
The Draw Order determines the order in which particles are drawn (i.e. which particles are drawn on top of others).
| Default (old to new) | Reversed (new to old) |
|---|---|
| Older particles are drawn first and newer particles are drawn on top of them. Older particles are drawn behind newer ones. | Newer particles are drawn first and older particles are drawn on top of them. Newer particles are drawn behind older ones. |
 |  |
The Copy GML to Clipboard button ![]() copies the GML Code needed to create the particle system at runtime, including its emitters and particle types to the clipboard. You can then paste that code to create a particle system that will look exactly the same. For more information, see Copy GML to Clipboard.
copies the GML Code needed to create the particle system at runtime, including its emitters and particle types to the clipboard. You can then paste that code to create a particle system that will look exactly the same. For more information, see Copy GML to Clipboard.
Toolbox
The Toolbox is shown in the top-right corner of the canvas.
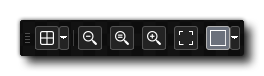
It contains the following:
- Toggle Grid
 : This toggles the grid on the canvas. The caret contains more options, such as the grid size, enable/disable snap to grid and the grid colour.
 - Zoom Controls
 : Zoom in, reset zoom, zoom out, centre fit.
 - Canvas Settings

 : Enable or disable the canvas frame here and set its origin and dimensions (default is 1366x768). You can also set a background image here to use as a reference.
Emitters
You can create emitters inside a particle system. One emitter emits one type of particle.
An emitter has a region and a shape. Particles are created inside the shape stretched across the emitter's region.
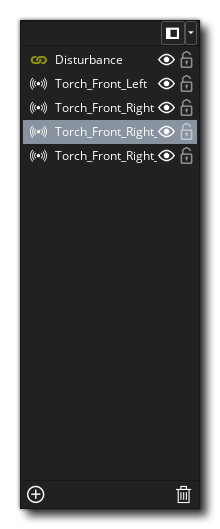
By default, all emitters in the particle system are listed on the left side of the canvas. Click Add ![]() to add a new one. Click Delete
to add a new one. Click Delete ![]() to delete the selected particle emitter(s).
to delete the selected particle emitter(s).
Right-clicking on an emitter allows you to delete, cut, copy, duplicate and rename the emitter.
Click the Eye icon ![]() in the list to disable (pause) the emitter, and the padlock icon
in the list to disable (pause) the emitter, and the padlock icon ![]() to lock it. Locking prevents changes to any of its properties, both on the canvas and in The Inspector.
to lock it. Locking prevents changes to any of its properties, both on the canvas and in The Inspector.
Use the Docking menu ![]() to undock/dock the emitter list, or change its position around the canvas.
to undock/dock the emitter list, or change its position around the canvas.
Configuring an Emitter
Particle emitters and the particles they create can be fully configured in The Inspector.
For details on configuring emitters, see: Emitter Properties
Shared Emitters
Emitters that you create can be shared between particle system assets in your GameMaker project. This requires them to be saved in the library as presets.
GameMaker also comes with some built-in presets you can choose from. You can load a built-in preset into an emitter, make your changes and save it as a new preset. The built-in presets themselves can't be modified, so the preset will be unlinked the moment the emitter's settings are changed.
NOTE Shared emitters are stored per-project. They're only available in the project they're created in, and are not shared among different projects.
Creating a Preset
After configuring a particle emitter to your liking, click Save as Preset ![]() under the "Library" panel (seen above) and enter a name for the new preset:
under the "Library" panel (seen above) and enter a name for the new preset:
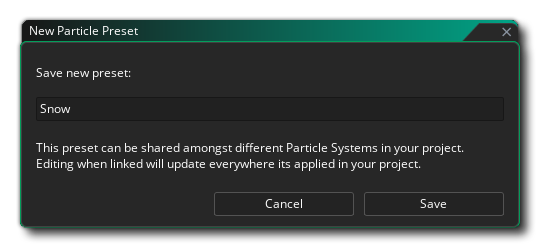 Click "Save" to confirm saving the emitter as a new preset.
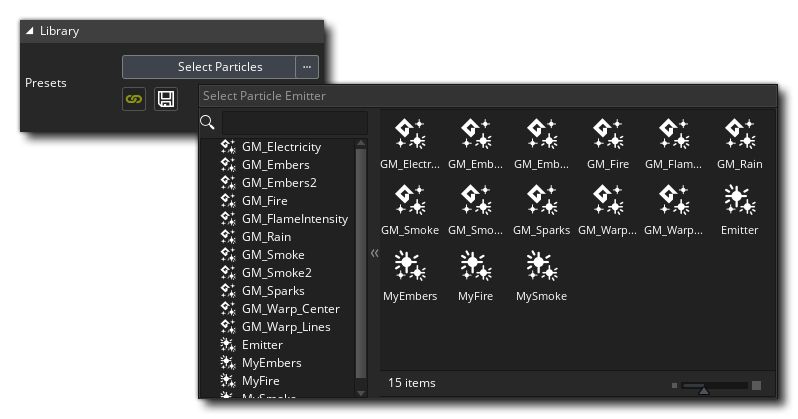
The emitter is now linked to the preset. Instead of "Select Particles" (or "Custom Particles" for an emitter after unlinking), the name of the new preset is now shown under the "Library" panel. The Link/Unlink button ![]() is also highlighted, indicating that this emitter's properties are linked to the library preset (the properties under all panels that show the yellow chain icon on the right are linked to the preset).
is also highlighted, indicating that this emitter's properties are linked to the library preset (the properties under all panels that show the yellow chain icon on the right are linked to the preset).
Linking an Emitter to a Preset
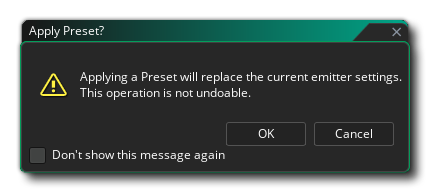
Emitters in a particle system can be linked to a previously created emitter preset in the library. To do this, click "Select Particles" under the "Library" panel and select the preset you want to use for this emitter.
Doing this will override your emitter's settings with the selected preset. Click "OK" when asked for confirmation:
As with creating a preset, the Link/Unlink button ![]() becomes highlighted to indicate that this emitter's properties are linked to the library preset.
becomes highlighted to indicate that this emitter's properties are linked to the library preset.
Changing Linked Emitters' Properties
When you create an emitter preset, the "Emitter Settings" (such as the distribution, shape, region) are initially saved. However, if you change these emitter settings after creating the preset, the new settings will not be saved to the preset.
On the other hand, the rest of the emitter properties (such as textures, colour, life, scale, etc.) are saved to the preset whenever they are changed.
When a preset is modified, that change is applied to all emitters that are linked to the preset, even if they are in different particle system assets.
Unlinking an Emitter from a Preset
Click the Link/Unlink button ![]() to unlink an emitter from a preset. The emitter keeps the properties it got from the preset, but these can now be changed independently. Instead of being stored in the preset, they are now stored in the emitter itself.
to unlink an emitter from a preset. The emitter keeps the properties it got from the preset, but these can now be changed independently. Instead of being stored in the preset, they are now stored in the emitter itself.
In this case, the Preset shows "Custom Particles" to indicate they are specific to this emitter.