When you want to draw text in your game this text is drawn in a standard Arial 12-point font, but to make more interesting or unique looking texts you will probably want to use different fonts. So, to use different fonts that you have on your computer you must create a font asset in GameMaker. This is done by right clicking ![]() on The Asset Browser and selecting "Create" -> "Font". For each font asset you create you specify a particular type of font from your computer which can then be used in your game using the action or code to set a font for drawing.
on The Asset Browser and selecting "Create" -> "Font". For each font asset you create you specify a particular type of font from your computer which can then be used in your game using the action or code to set a font for drawing.
Fonts in The Font Editor can make use of SDF rendering so text stays sharp as it's scaled up. Enable it under Rendering Options (listed below), or run font_enable_sdf on the font at runtime.
Once SDF is enabled, you can apply various effects to your font at runtime.
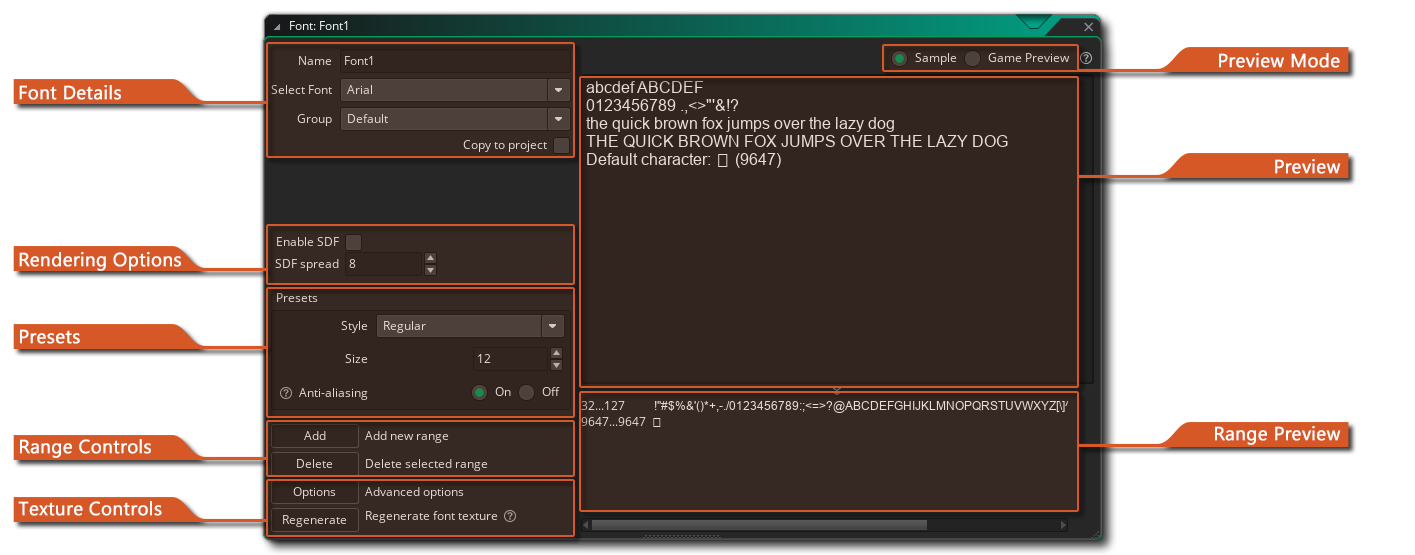
The Font Editor window contains the following options:
Here you can give your font a unique name (alpha numeric characters and the "_" under-bar symbol only), as well as choose the font to use. The font must be installed on your machine and due to licensing issues, GameMaker does not store the actual font files with the project file by default, but rather the font is rendered to a texture page as a series of bitmap glyphs. The texture page will be assigned to a texture group, which you can choose from the Group option here too.
If you want to distribute the actual font file (*.ttf or *.otf only) along with the project when making a Marketplace asset or for any other reason, you can check the option Copy To Project. This will open the file explorer where you can select the font file and it will then be added to the files bundled with the project.
IMPORTANT You should only use fonts that you are legally permitted and licensed to redistribute or use in your project.
Rendering OptionsRendering Options
This section contains two options:
In this section you can set the size (in points - default is 12pt) and whether the font should be drawn as bold or italic or have anti-aliasing applied. The preview window on the right will show you the text approximately as it will look in your game with the size and transforms you have specified.
When creating a font resource it's rare that you'll want to include every single glyph for the font. This is why GameMaker defaults to using only the characters from 32 till 127 of the chosen font as this gives us the numbers and the small and capital letters along with certain punctuation marks. You can, however, change the character range used to help optimise your games ie: if you only need the numbers from a specific font, then only select the numbers. To do this, you should first click the Delete button to clear the current range (you may need to select the range for this to work by clicking ![]() on it in the preview window) and then click on the Add button to add a new range. This will open the following chained window:
on it in the preview window) and then click on the Add button to add a new range. This will open the following chained window:
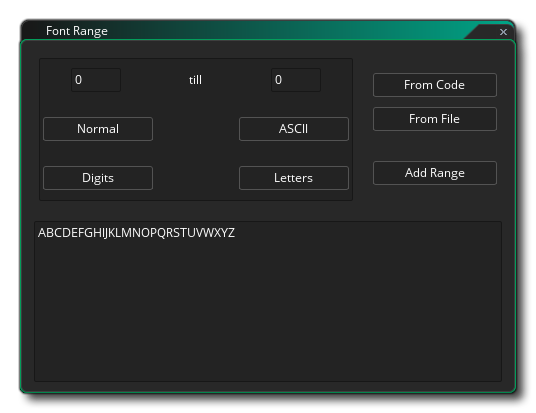 This window has some buttons to help you establish a standard range for your font:
- The Normal range from 32 till 127
- The ASCII range from 0 till 255
- The Digits range that only contains the 10 digits
- The Letters range that contains all upper-case and lower-case letters only
Other ranges can be used by typing in the first and last character index of the range you wish to set in the character range input boxes (if a character does not lie in the range it is replaced by a space). Apart from these buttons and input boxes, you also have two further options which are especially useful:
NOTE You can manually edit the text range by adding or deleting text glyphs into the preview window directly.
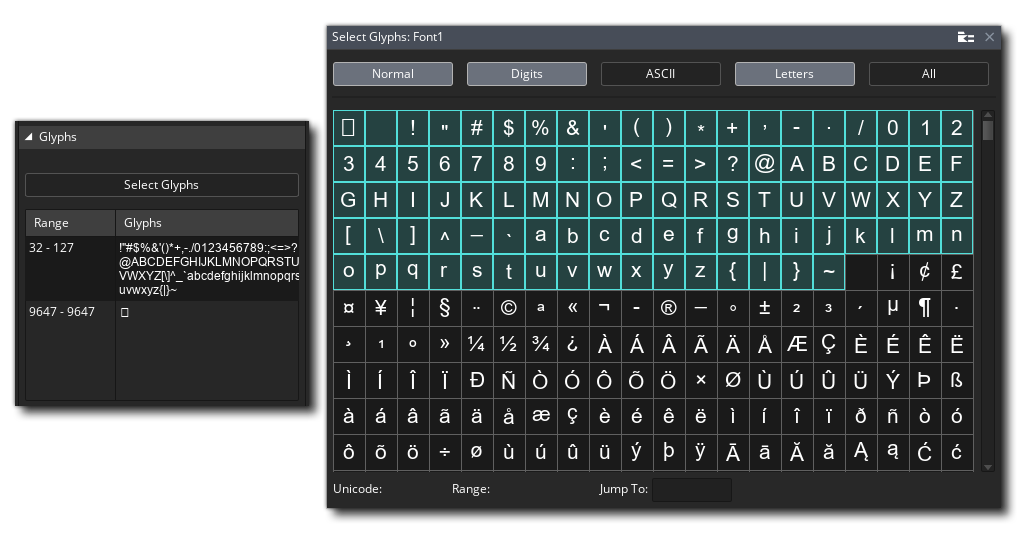
The Inspector contains a "Select Glyphs" option that you can use to select glyphs visually:
Texture ControlsTexture Controls
As mentioned above (in the section on Font Details) by default all font glyphs will be rendered to a texture page as part of a texture group to convert them into graphical resources, and when the game is compiled the font will be added to a temporary texture to create a single image with all the required font glyphs and then this will be added to the main texture group for exporting. The buttons here are for tweaking how the font texture is generated or for regenerating a new font texture.
The Options button will open up the advanced font texture options:
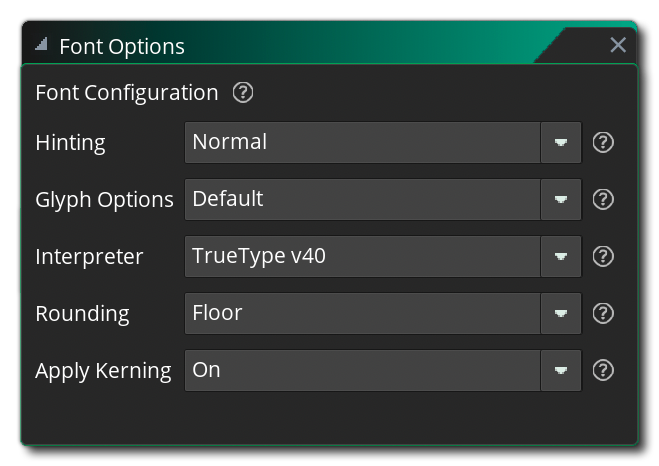 These options can, sometimes radically, alter how a font will be displayed in the game, and not all fonts will require the same settings. The following options are designed to give you the greatest customisation possible for your font:
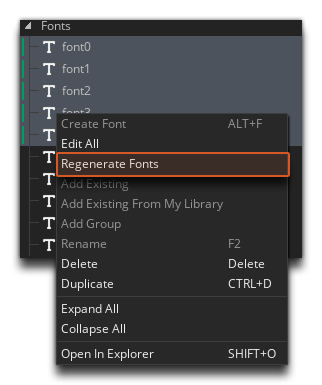
The Regenerate button can be used to regenerate the font texture. This is required if you want to update any changes you've made to an existing font, or if you have created a new font and you want to see how it looks in the Preview Window. Note that you can also regenerate fonts from the right button ![]() menu for the font (or fonts) in The Asset Browser.
menu for the font (or fonts) in The Asset Browser.
 It is important to note that when you first create a new font, if you don't regenerate the texture in the editor, then the texture will be created the first time you run or test your game, but that is the only time that it will be automatically generated. This means that once a font has a generated texture, any changes made to the font resource will require that the font is regenerated for the changes to be visible in the game, otherwise the "old" font texture will still be used.
GameMaker will render the generated font texture as a PNG file along with the rest of the project files, and should you load the project and the base font is not found, then the game will still display text correctly using the stored texture. A missing font will mean, however, that you can no longer change any of its properties, other than its name, font family and texture group (from the Texture Group Editor).
In this section you can choose to have the Preview Window show either some sample text of the font selected, or the rendered texture image that has been generated for the font.
The Preview Window is where you can see a preview of the font, either as a sample of text, or as a texture. When the Preview Mode is set to Sample, you can type in any text that you want to test directly into the preview window to see how it looks, while selecting Game Preview will show the rendered texture image that was generated for the font. If no image is present, then you should click the Regenerate button to generate the texture.
NOTE The texture image can be different to the sample, since the texture will not be regenerated unless explicitly told to. This means that after you have initially generated a font texture, changes made to the font resource will not be carried over to the game unless the texture is regenerated.
Here the different character ranges that you have added for the font will be listed. The range values are shown on the left and the range glyphs that correspond to those values are shown on the right.