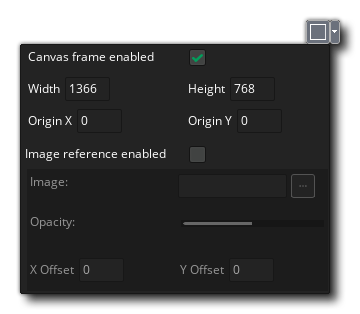
When creating sequences for your projects a large part of the work will be done in the canvas of the Sequence Editor. The canvas is simply the area that will be used to contain the sequence elements, and it also defines what will be shown when the sequence is added to a room to be displayed. When you first create a sequence, the canvas will be set to the default size of 1366px by 768px, but this can be changed from the Toolbox by clicking the ![]() beside the Canvas Frame Toggle
beside the Canvas Frame Toggle ![]() button:
button:
 The canvas size defines a visual area within which to place the assets that make up the sequence, but the frame is simply a guide to size and will not affect how things are rendered, ie: if you place a sprite asset outside the frame and add the sequence to a room, the asset will still be rendered.
The frame is also used to house any reference images that you want to use to guide the positioning of assets within the sequence. A reference image can be added from the same Canvas Options menu where you set the size of the canvas frame, and will be used as a background image for the sequence canvas. This permits you to position things according to - for example - a UI mock-up from a project artist:
 Note that reference images are not stored with the project and will not be rendered when the sequence is added to a room.
Once you have the canvas set up how you want you can start to add assets to it. This is done simply by dragging them from the Asset Browser into the canvas, which will create an asset track in the Track Panel:
 The assets that can be added to a sequence are as follows:
You can also use the ![]() Text tool in the Toolbox to create a text track. Read Text in Sequences for more information.
Text tool in the Toolbox to create a text track. Read Text in Sequences for more information.
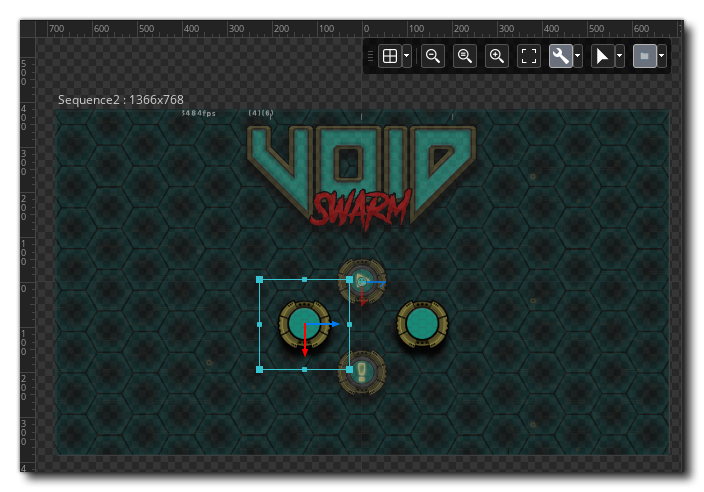
Once you have added the assets that are required, they can be placed at their initial positions for the animation, and can also be transformed using the various different Transform Control Gizmos. These are accessed in two different ways:
When you have set the initial transforms for the asset (if required) you can then use the canvas to add parameter keys to the asset track in the Track Panel. A simple example of how this works would be a basic position transform, where you would place the asset at it's start position, then move the playhead in the Dope Sheet to the frame you want the movement to end, and then move the asset again:
 As you can see in the image above, the new positions are automatically being recorded on the track as we have enabled "Automatically Record Changes"
 ![]() in the Track Panel. You can also see that a dotted line has been added to the canvas view to indicate the movement through time of the asset. If you do not have the automatic recording enabled, you can still add points by moving the asset, then setting the playhead and then finally clicking the "Record a new key"
in the Track Panel. You can also see that a dotted line has been added to the canvas view to indicate the movement through time of the asset. If you do not have the automatic recording enabled, you can still add points by moving the asset, then setting the playhead and then finally clicking the "Record a new key" ![]() button.
button.
One final point worth mentioning is that the canvas permits you to use and add smart guides, which are guidelines that can be added to the canvas so that assets can be aligned against them. By default the canvas will show horizontal and vertical guides around the center point, as well as a rectangular guide around the "edge" of the sequence canvas, based on the size of the canvas. These guides will not be rendered in the final sequence when added to a room and are just there to help you get an idea of space and to help position things. You can also add your own guides by clicking ![]() on a ruler and then dragging into the canvas:
on a ruler and then dragging into the canvas:
 To remove a guide, simply click on it and then drag it back towards the rulers again. When you have guides added to a sequence, moving an asset around will then "snap" to the guide when the bounding box or origin is near enough, and extra smart guides will be shown to mark the distances between assets as well as to mark assets that are all on the same guide or at the same position (these are coloured differently):
To navigate around the canvas view, you can use the same basic controls as the for a regular Workspace, ie: Use the middle mouse button ![]() and drag to pan the canvas (or alternatively use the
and drag to pan the canvas (or alternatively use the ![]() +
+ ![]() ), and you can scroll horizontally with the mouse wheel
), and you can scroll horizontally with the mouse wheel ![]() or zoom in and out using the
or zoom in and out using the ![]() /
/ ![]() key and the mouse wheel
key and the mouse wheel ![]() .
.
To select an asset, simply click the left mouse button ![]() on it, or you can select multiple assets using
on it, or you can select multiple assets using ![]() /
/ ![]() and
and ![]() to click on each asset. You can also select multiple assets using
to click on each asset. You can also select multiple assets using ![]() and then clicking
and then clicking ![]() and dragging. This will create a "box" in the canvas and any asset that touches the box area will be selected.
and dragging. This will create a "box" in the canvas and any asset that touches the box area will be selected.
When you have an asset or assets selected, you can cut, copy and paste them using the ![]() /
/ ![]() +"X",
+"X", ![]() /
/ ![]() + "C" and
+ "C" and ![]() /
/ ![]() + "V" key combinations.
+ "V" key combinations.
Note that when multiple assets are selected in the canvas, there will be a bounding box shown for each asset, and a larger bounding box shown for all of them combined. You can change how this bounding box behaves from the icons at the top left corner:
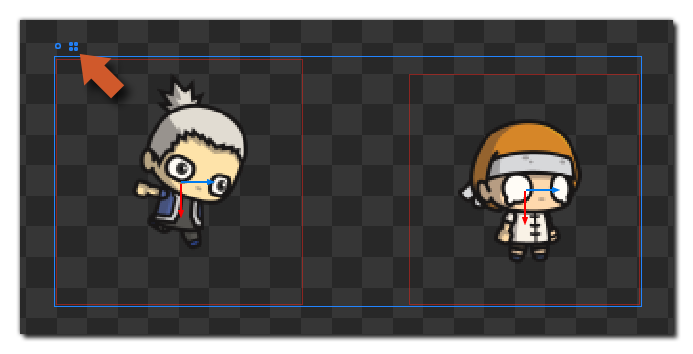 Clicking on the circle icon will change the transform control gizmo to the origin of the full bounding box for all assets selected, while clicking the box icon will show an individual control widget for each asset in the selection. You can move grouped assets around and copy/paste them etc... just as you would for a single asset.
If you have multiple assets that are overlapping and wish to select a specific one without disturbing the rest, then you can hover the mouse over them to bring up the Item Toolbox which will show a list of icons for each item under the mouse. You can then click on one of these items to select it and edit it:
 You also have a number of additional options available to you from the right mouse button
 ![]() when you click it on any asset in the sequence:
when you click it on any asset in the sequence:
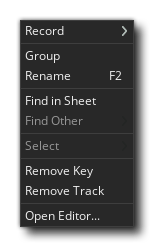 The options available here are: