Compiling your game can mean one of two things: compiling it for testing, or compiling it to create a final executable package for a specific target platform. This page aims to explain both of those options in detail.
Compiling your game for testing can be done by simply pressing the Play button ![]() at the top of the IDE, which will launch the game for testing using the specified target. You can also run the game in Debug Mode by testing using the Debug button
at the top of the IDE, which will launch the game for testing using the specified target. You can also run the game in Debug Mode by testing using the Debug button ![]() . This will run the game, but also open up the Debug Window, where you can monitor how your game performs and see any issues (see the section on Debugging for more information).
. This will run the game, but also open up the Debug Window, where you can monitor how your game performs and see any issues (see the section on Debugging for more information).
By default GameMaker will run and debug using the built-in Virtual Machine (VM), which is more or less the same as running on the desktop OS being used. However, GameMaker is a cross-platform engine and you can test, debug and compile executable packages of your projects on a number of different target platforms (the exact platforms available will depend on the details of your licence). To change the current target platform you can click ![]() on the Targets button
on the Targets button ![]() to open the Targets Window, which will look something like this (exact details will vary based on your licence type):
to open the Targets Window, which will look something like this (exact details will vary based on your licence type):
 At the top, beside the Targets button, you have the current settings which tells you the platform and the specific settings actually being used, and then the rest of the window is taken up with the details and options for all the available targets which you can select to use instead. Each section of this window is explained below:
This section lists all the available target platforms, which depends on the licence you have.
To select a target, simply click ![]() on it; this will then update the rest of the options windows to show different details depending on the platform selected. If you don't have the required module installed in the current runtime then GameMaker will ask you to download and install it when you click
on it; this will then update the rest of the options windows to show different details depending on the platform selected. If you don't have the required module installed in the current runtime then GameMaker will ask you to download and install it when you click ![]() the target:
the target:
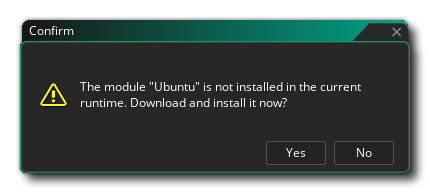
If you select "No" here then the target will be reset to the previous target you had selected.
If you select "Yes" then the modules for the target will be downloaded and installed.
NOTE See the Runtime Feeds Preferences page for more info on how to change which modules are included.
Specific details on compiling for each platform are given below in Creating A Final Executable Package.
Each target platform can have one or more output formats, the main ones being:
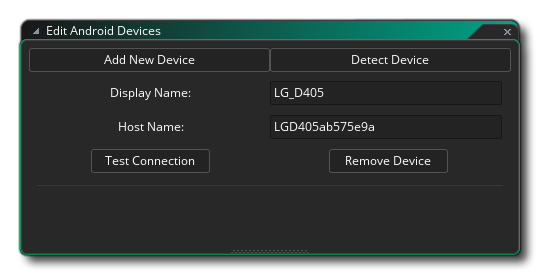
Certain platforms (like iOS or Android) permit you to associate one or more devices with GameMaker so that games can selectively compile to them. Initially, the device list will be empty and you need to click ![]() on the Pencil icon
on the Pencil icon ![]() to open the Device Editor:
to open the Device Editor:
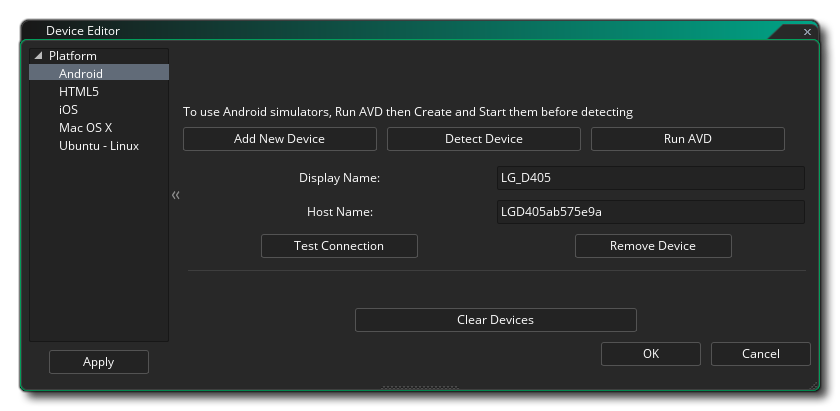 Here you can add new devices as well as have GameMaker test for a connection to any device(s) that may be connected. The exact contents of this window will depend on the platform specifics (see the section on the Device Manager for exact details for any given platform). Once a device has been found or added, it will then be shown in this window, like in this example image for Android:
 The exact procedure and requirements for setting up devices and troubleshooting issues can be found in the appropriate section of the GameMaker Knowledge Base.
As explained in the section on Configurations, you can store certain details for compiling your game as Configs. This section of the Targets window permits you to have GameMaker automatically select a specific configuration for a specific target platform.
There are also a number or preferences that can be set to modify and customise the compile workflow, explained on the following page:
You can click the Create Executable button ![]() in the IDE to start the compiler build or select Create Executable from The Build Menu. Either process will start the build process which will depend on the target platform selected.
in the IDE to start the compiler build or select Create Executable from The Build Menu. Either process will start the build process which will depend on the target platform selected.
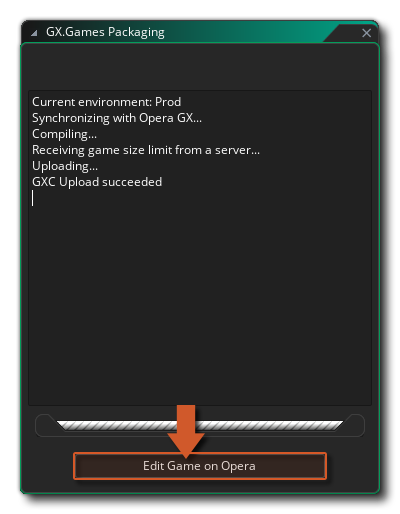
On the GX.games target, it will open a special window allowing you to compile and upload your game to GX.games; on all other targets it will open a file explorer window where you can give the final name that you wish to use for your game executable, before clicking Save to start the compile and build process. Once you have done this, the necessary files will be generated so that you can distribute it as you wish.
Here are some things to keep in mind when creating executables:
You can optimise how the compiler compiles (parts of) your game's code by providing it optimisations with the "optimise" (or "optimize") pragma. These may apply to multiple targets or be specific to some build targets. Using them in the right places in your code can lead to great performance improvements in your game.
See gml_pragma for the full list of optimisations you can use and how to use them.
Each target option saves to a platform specific format, listed below:
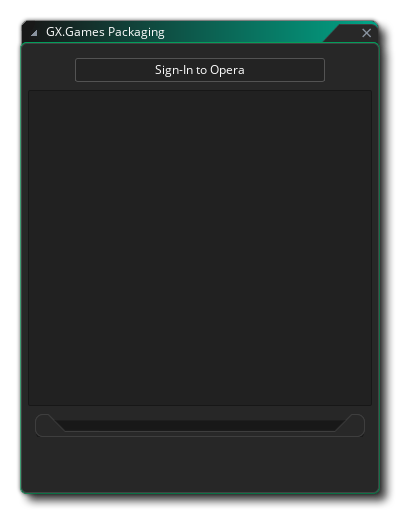 You won't need to sign in here if you've already signed into GameMaker using Opera Single Sign-In.
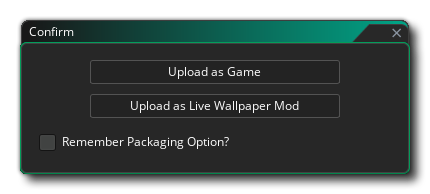
 Please refer to this page to learn more about the GX.games upload process, and this page for setting up the various exports, such as YYC and Mobile.
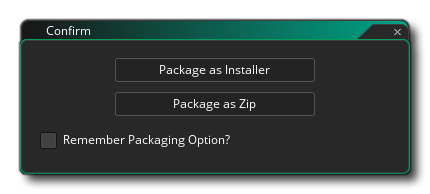 If you check the box marked Remember Packaging Option then GameMaker will remember the choice for all future compiles (this can be reset or changed from the Windows Preferences). You can find out more from the YoYo Games Help Center.
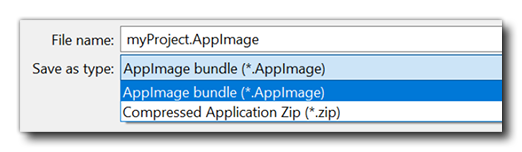 .AppImage is used for sharing as a package via any distributor except Steam, while .zip is used only for uploading to Steam (as it uses the Steam Runtime specifically). Because of this, the created .zip cannot be opened as a regular zip file.
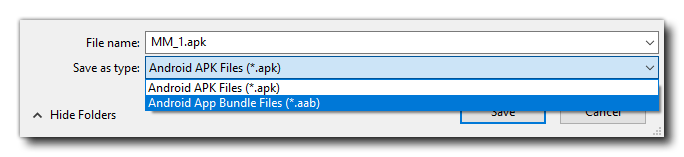 The type of file you choose will depend on the store that you wish to target, with the *.aab file being required for Google Play, while the *.apk file can be used on other stores. You can find out more from the YoYo Games Help Center.
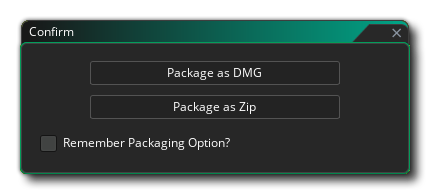 "Package as DMG" will build a .dmg installer package which can be used to install the game on a Mac computer. Note that during this build process you will see the installer appear on the Mac, which will disappear once the build process is complete.
Once you have created your executable asset package you can then give the file to other people or place it on your website to download, or upload these files to the different hosting services for individual distribution or even to online stores (like Google Play, Apple App Store or the Microsoft Store) for general distribution and retail.
Note that you are free to distribute the games you create with GameMaker in any way you like, including selling them. Of course, this assumes that the sprites, images, and sounds you used to make it can be distributed or sold as well and that you have the legal rights to all assets, and it also assumes that the game complies with the YoYo Games EULA for GameMaker.