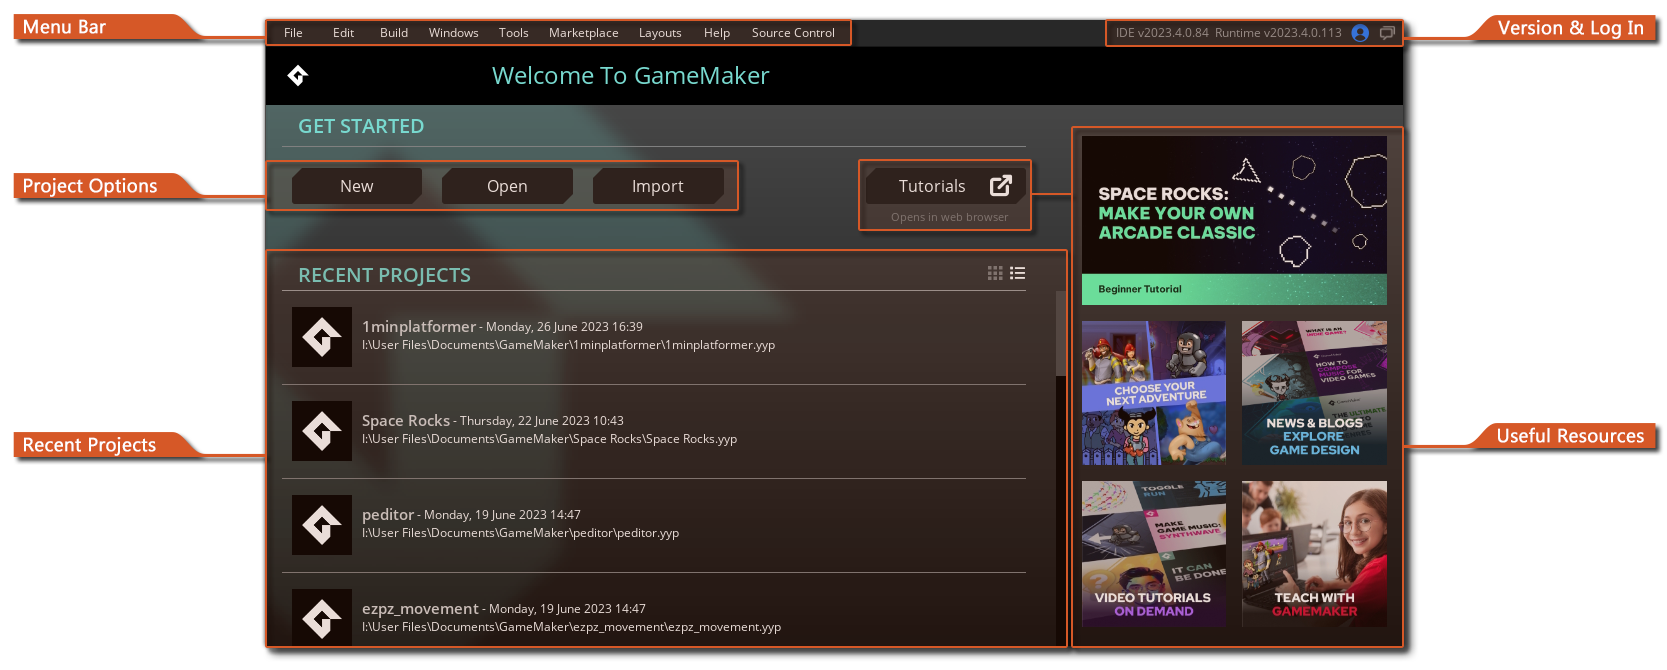
When you open GameMaker, the main IDE will open on the Start Page:
When you start GameMaker for the first time, you will be able to see a description for each start screen element by hovering over it.
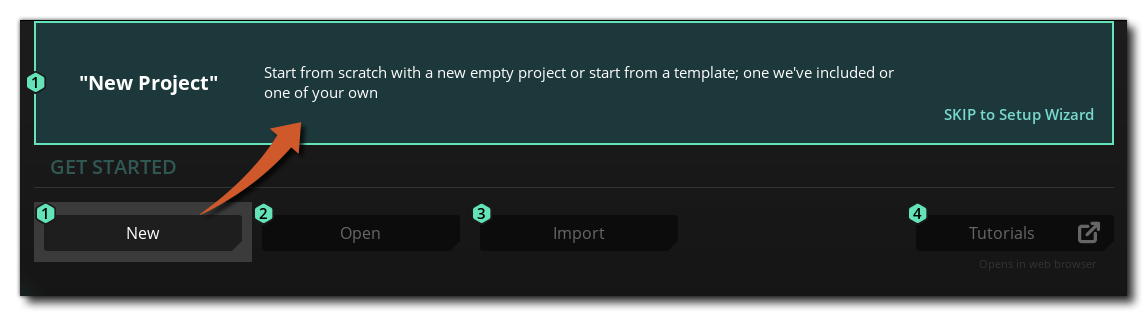 Here, you can click on the "SKIP to Setup Wizard" button to start creating your first project with the help of the Setup Wizard, which will take you through the steps necessary for creating your first game in GameMaker.
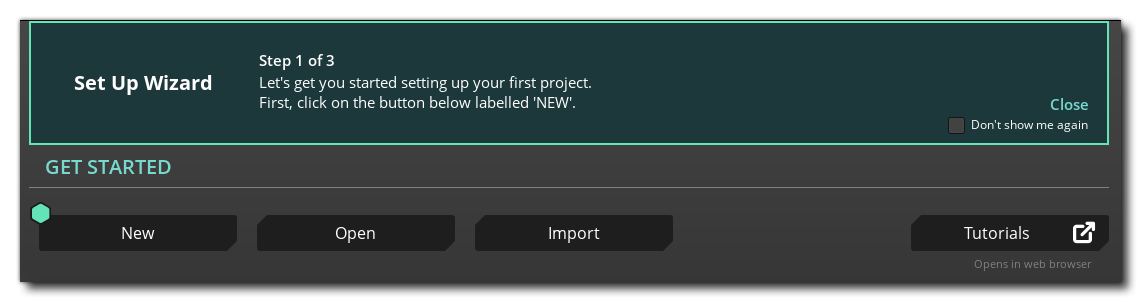
You can also click on "Close" to close the wizard and continue using GameMaker manually, and optionally enable the "Don't show me again" checkbox if you do not wish to see the wizard when you start GameMaker again.
WARNING A warning message will be shown if GameMaker detects that your "My Projects" directory is set to a cloud storage location, as saving projects to cloud storage may cause problems when saving and building projects. You'll be asked to change it in the Path Preferences:
The Start Page contains the following elements:
At the top you can find the general IDE menus which are explained in the following sections of the manual:
Note that there will also appear context specific menu options in the top menu bar, depending on the window that you have focused on currently. For example, if you have the Image Editor window in focus then you will have extra menu items here for "Images", "View" and "Effects". These extra menu items are explained in the relevant sections of the manual for the workspace or window that generated them.
You can click the New button to create a new project, the Open button to open an existing project or the Import button to open a compressed YYZ GameMaker project file or a legacy GameMaker: Studio 1.4 GMX project file. Both Open and Import will open the file explorer for you to browse to the project file you require.
NOTE GameMaker is not completely backwards compatible with GameMaker: Studio 1.4 projects but imported 1.4 projects should still run, as obsolete functionality has been recreated for you automatically using compatibility scripts. For full details of the possible issues and the changes made to GML, please see the Help Center article Porting A GMS 1.4 Project To GameMaker, as well as the section of the manual on Obsolete Functions.
To create a new project simply click the button labelled New, which will open the Project Type and Template menu:
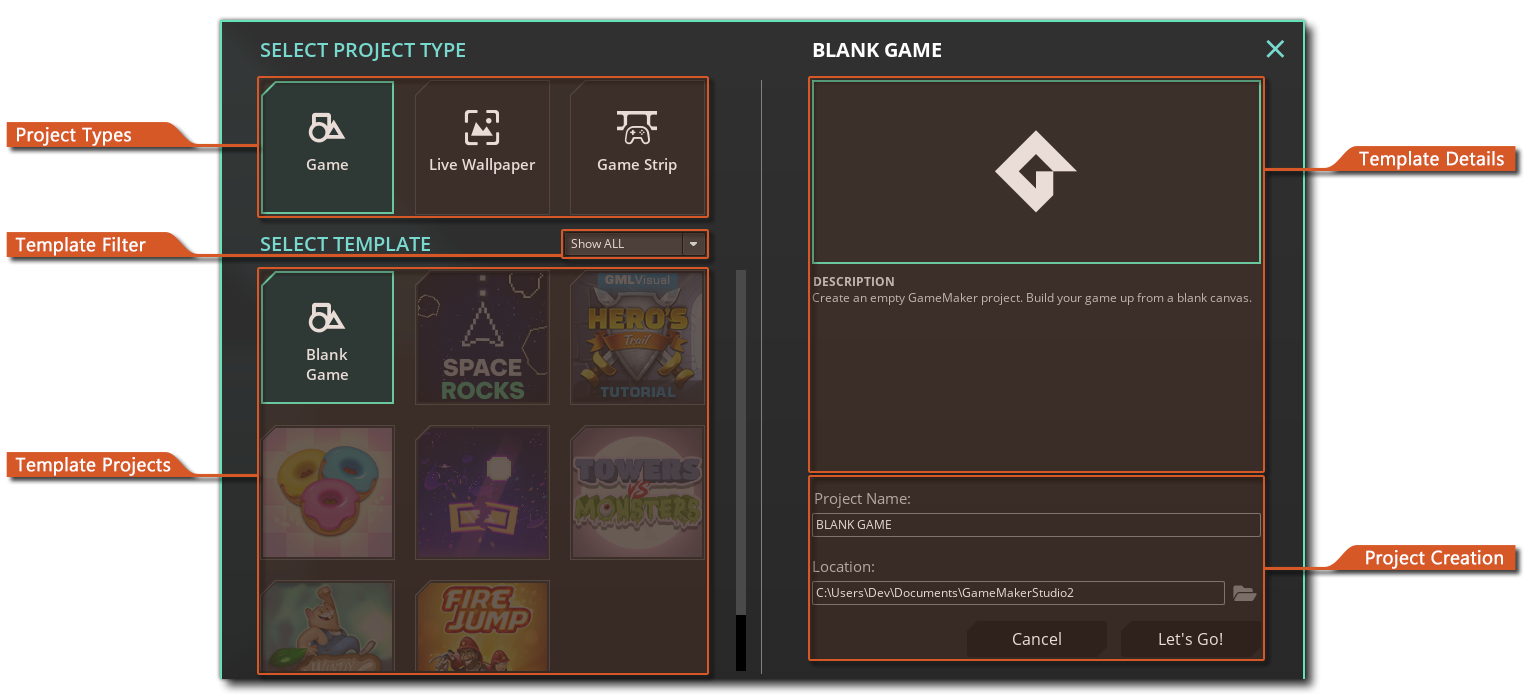
First select a project type, which should be Game unless you are making a Live Wallpaper or Game Strip for Opera GX.
After choosing your project type, select Blank or choose a template.
Then choose a name and save location for your project. If you selected a non-blank template, you may need to choose between GML Code and GML Visual versions.
Finally, click on Let's Go! to enter your new project.
WARNING A warning message is shown if GameMaker detects that the path you try to save the project to refers to a cloud storage location. Saving projects to cloud storage may cause problems when saving and building projects. See the Permissions Guide for more information.
TIP You can create your own template by opening a project, and exporting as a template.